阿里云ECS国内服务器部署Dokploy教程
这两天因为一些第三方项目需求,要在一台阿里云的国内ECS服务器上安装Dokploy并且部署NextJS应用,在安装Dokploy的过程中遇到很多坑,并且没有找到什么很好的教程能有效解决我的问题,折腾了好久终于装好,遂把我遇到的坑以及完整的安装过程记录下来,以供有需要的朋友参考。
我的配置环境:阿里云ECS服务器,配置:2C2G,区域:华东1(杭州),系统:Ubuntu24.04
目录
- Dokploy简介
- 什么是Dokploy?
- 安装Dokploy
- 正常安装
- 国内服务器安装
- 修改安装脚本
- 配置Docker镜像源
- 运行安装脚本
- 配置防火墙
- 访问后台
- 安装常见问题
- 配置后台
- 绑定域名
- 配置应用
- 配置GitHub
- 新建应用
- 直接Deploy
- 利用GitHub Action来Deploy
- 新建GitHub Token
- 配置Registry
- 配置Provider
- 配置项目Workflow
- 配置环境变量
- 配置应用域名
- 常见问题
- 参考代码
什么是Dokploy?
Dokploy 是一个开源的应用部署解决方案,提供一站式项目、数据的管理以及系统监控。
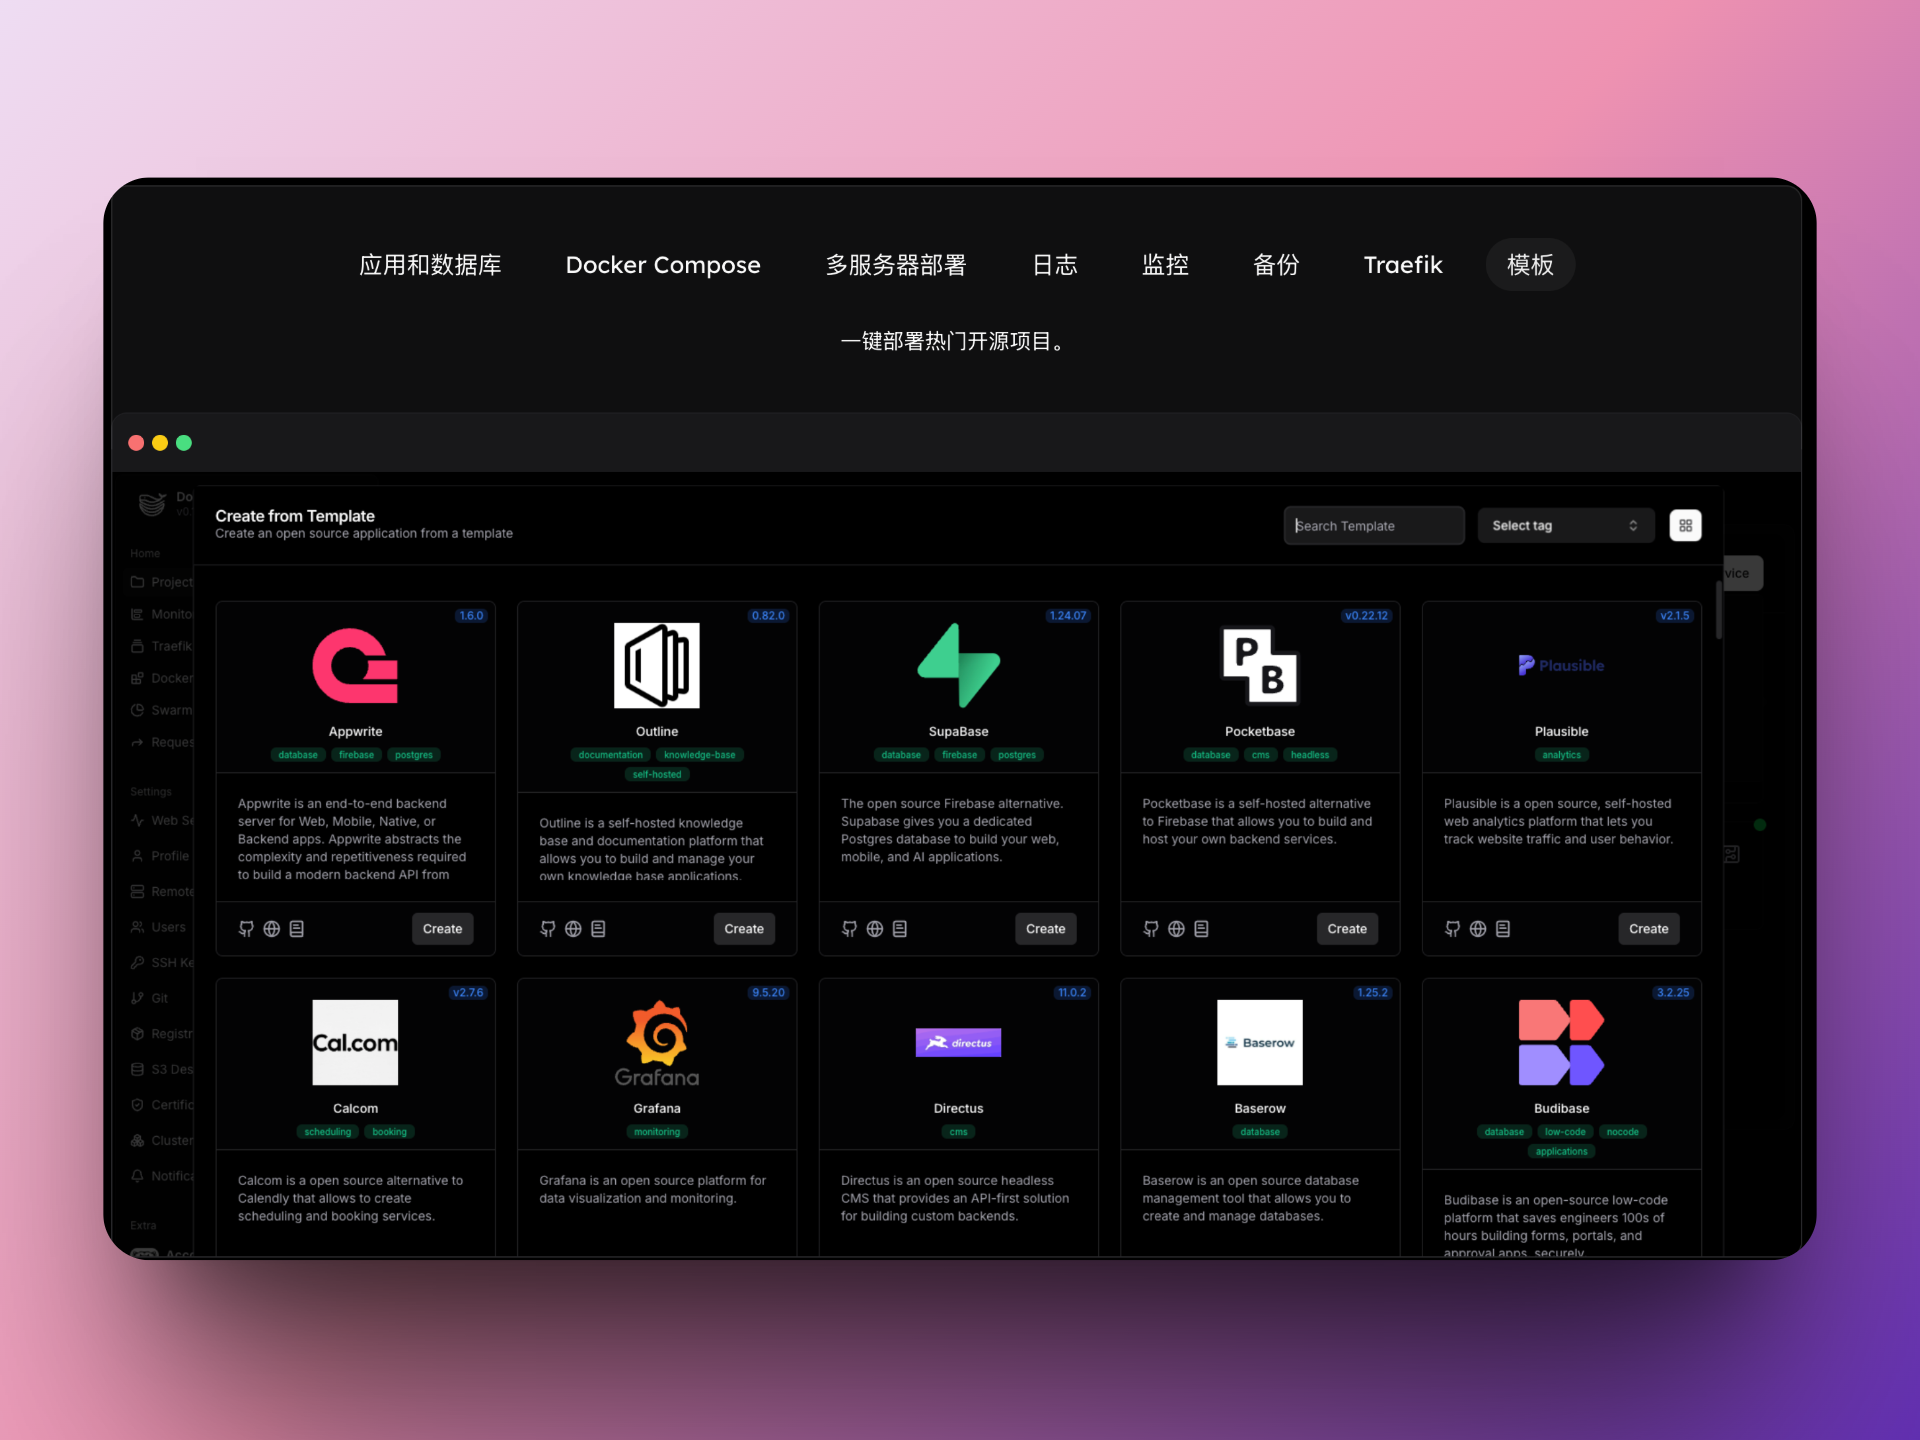
简单来说就是可以像Vercel一样地在自己的服务器上部署网站,并且还能部署数据库、Docker Compose等开源服务,例如Supabase,并且可以很方便地监控系统及应用日志
安装Dokploy
正常安装
如果你的服务器能直接访问到Dockerhub,直接拉Docker镜像,比如服务器是阿里云/腾讯云等国内云服务器厂商的境外区域服务器,或者是国外的云服务器厂商,比如Hostinger,那你就可以直接使用官方的安装脚本
curl -sSL https://dokploy.com/install.sh | sh
如果你还没买服务器,或者对服务器区域没有要求,那么我更建议你直接购买国外的云服务器,安装过程、后续维护都更方便,免去很多潜在的问题。
我自己就买了一台Hostinger的VPS服务器,2C8G配置,100GB的存储空间,8T的带宽,日常卖6.99刀一个月,经常会有搞活动两年只需800多rmb,对比之下还是很实惠的。这个配置也足够个人项目使用了,部署多个应用也不是问题。
国内服务器安装
如果你因为个人需求,必须使用国内的服务器部署,那么就可能会经历跟我一样的问题,你可以按以下步骤来。
- 先把官方install脚本下载下来
wget https://dokploy.com/install.sh
然后修改以下部分
docker pull postgres:16
docker pull redis:7
docker pull traefik:v3.1.2
docker pull dokploy/dokploy:latest

# Installation
docker service create \
  --name dokploy \
  --replicas 1 \
  --network dokploy-network \
  --mount type=bind,source=/var/run/docker.sock,target=/var/run/docker.sock \
  --mount type=bind,source=/etc/dokploy,target=/etc/dokploy \
  --mount type=volume,source=dokploy-docker-config,target=/root/.docker \
  --publish published=3000,target=3000,mode=host \
  --update-parallelism 1 \
  --update-order stop-first \
  --constraint 'node.role == manager' \
  -e ADVERTISE_ADDR=$advertise_addr \
  dokploy/dokploy:latest
修改为
docker pull postgres:16
docker pull redis:7
docker pull traefik:v3.1.2

# 修改以下部分
docker pull swr.cn-north-4.myhuaweicloud.com/ddn-k8s/docker.io/dokploy/dokploy:latest
docker tag  swr.cn-north-4.myhuaweicloud.com/ddn-k8s/docker.io/dokploy/dokploy:latest  docker.io/dokploy/dokploy:latest

# Installation
docker service create \
  --name dokploy \
  --replicas 1 \
  --network dokploy-network \
  --mount type=bind,source=/var/run/docker.sock,target=/var/run/docker.sock \
  --mount type=bind,source=/etc/dokploy,target=/etc/dokploy \
  --mount type=volume,source=dokploy-docker-config,target=/root/.docker \
  --publish published=3000,target=3000,mode=host \
  --update-parallelism 1 \
  --update-order stop-first \
  --constraint 'node.role == manager' \
  -e ADVERTISE_ADDR=$advertise_addr \
  # 修改以下部分
  swr.cn-north-4.myhuaweicloud.com/ddn-k8s/docker.io/dokploy/dokploy
- 修改docker镜像源为阿里云国内源 运行以下命令
# 1. 创建空的daemon.json
echo >/etc/docker/daemon.json

# 2. 写入docker镜像源
cat>/etc/docker/daemon.json <<END
{
  "registry-mirrors": [
    "https://mirrors-ssl.aliyuncs.com/"
  ]
}
END

# 3. 重启docker
systemctl restart docker
- 运行Dokoloy的install脚本
sh install.sh
当看到以下输出的时候,说明安装完成了
Congratulations, Dokploy is installed!
Wait 15 seconds for the server to srart
Please go to http://{服务器公网ip}:3000
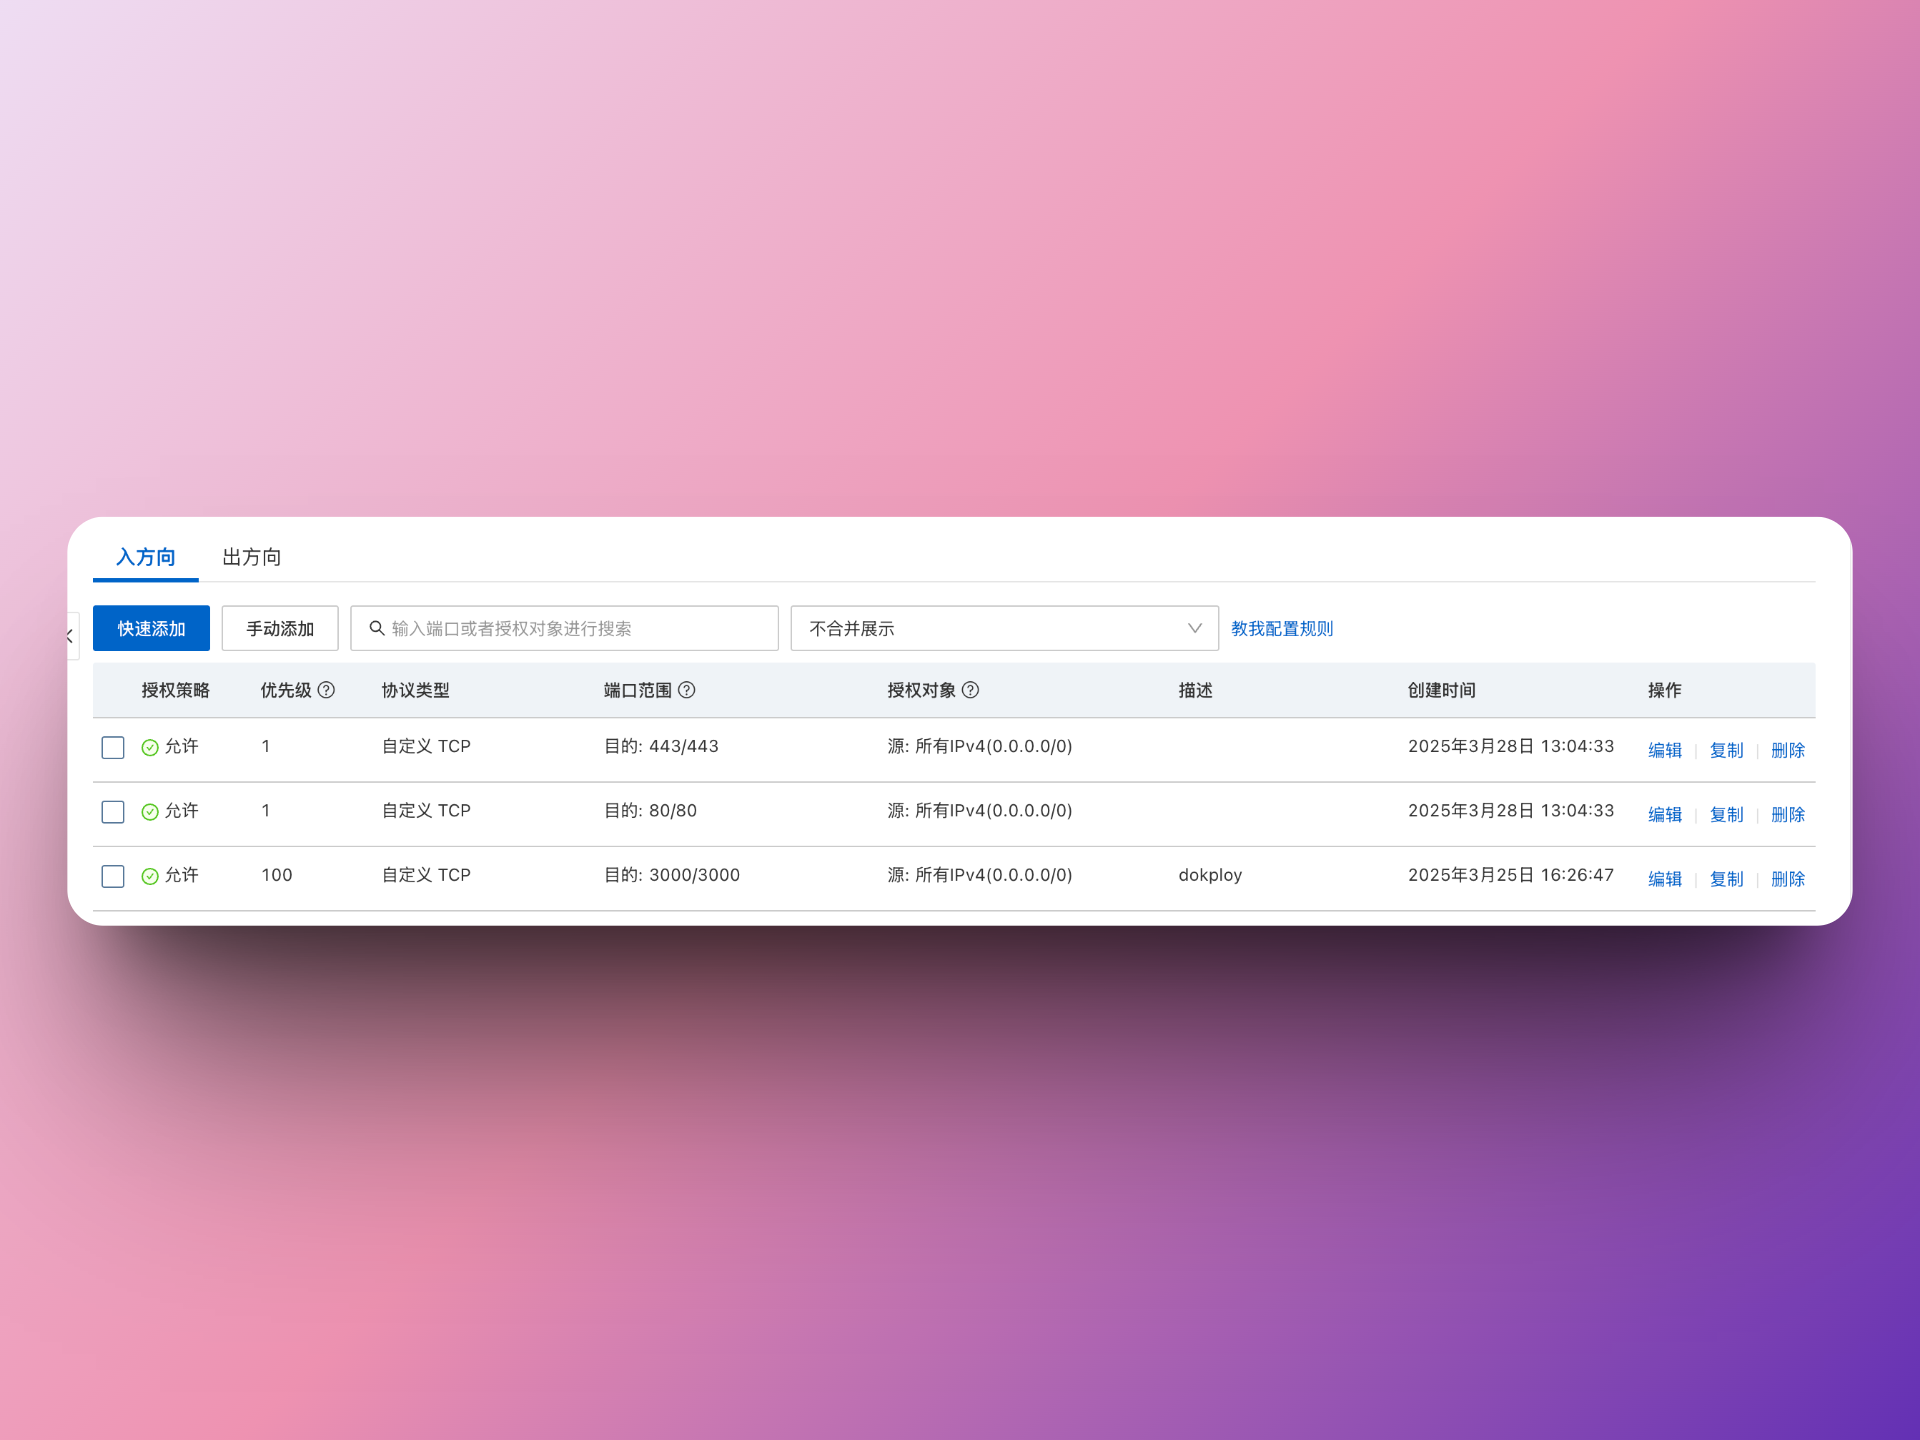
- 配置ip防火墙白名单
在安全组中新增一条针对3000、80、443端口的防火墙白名单
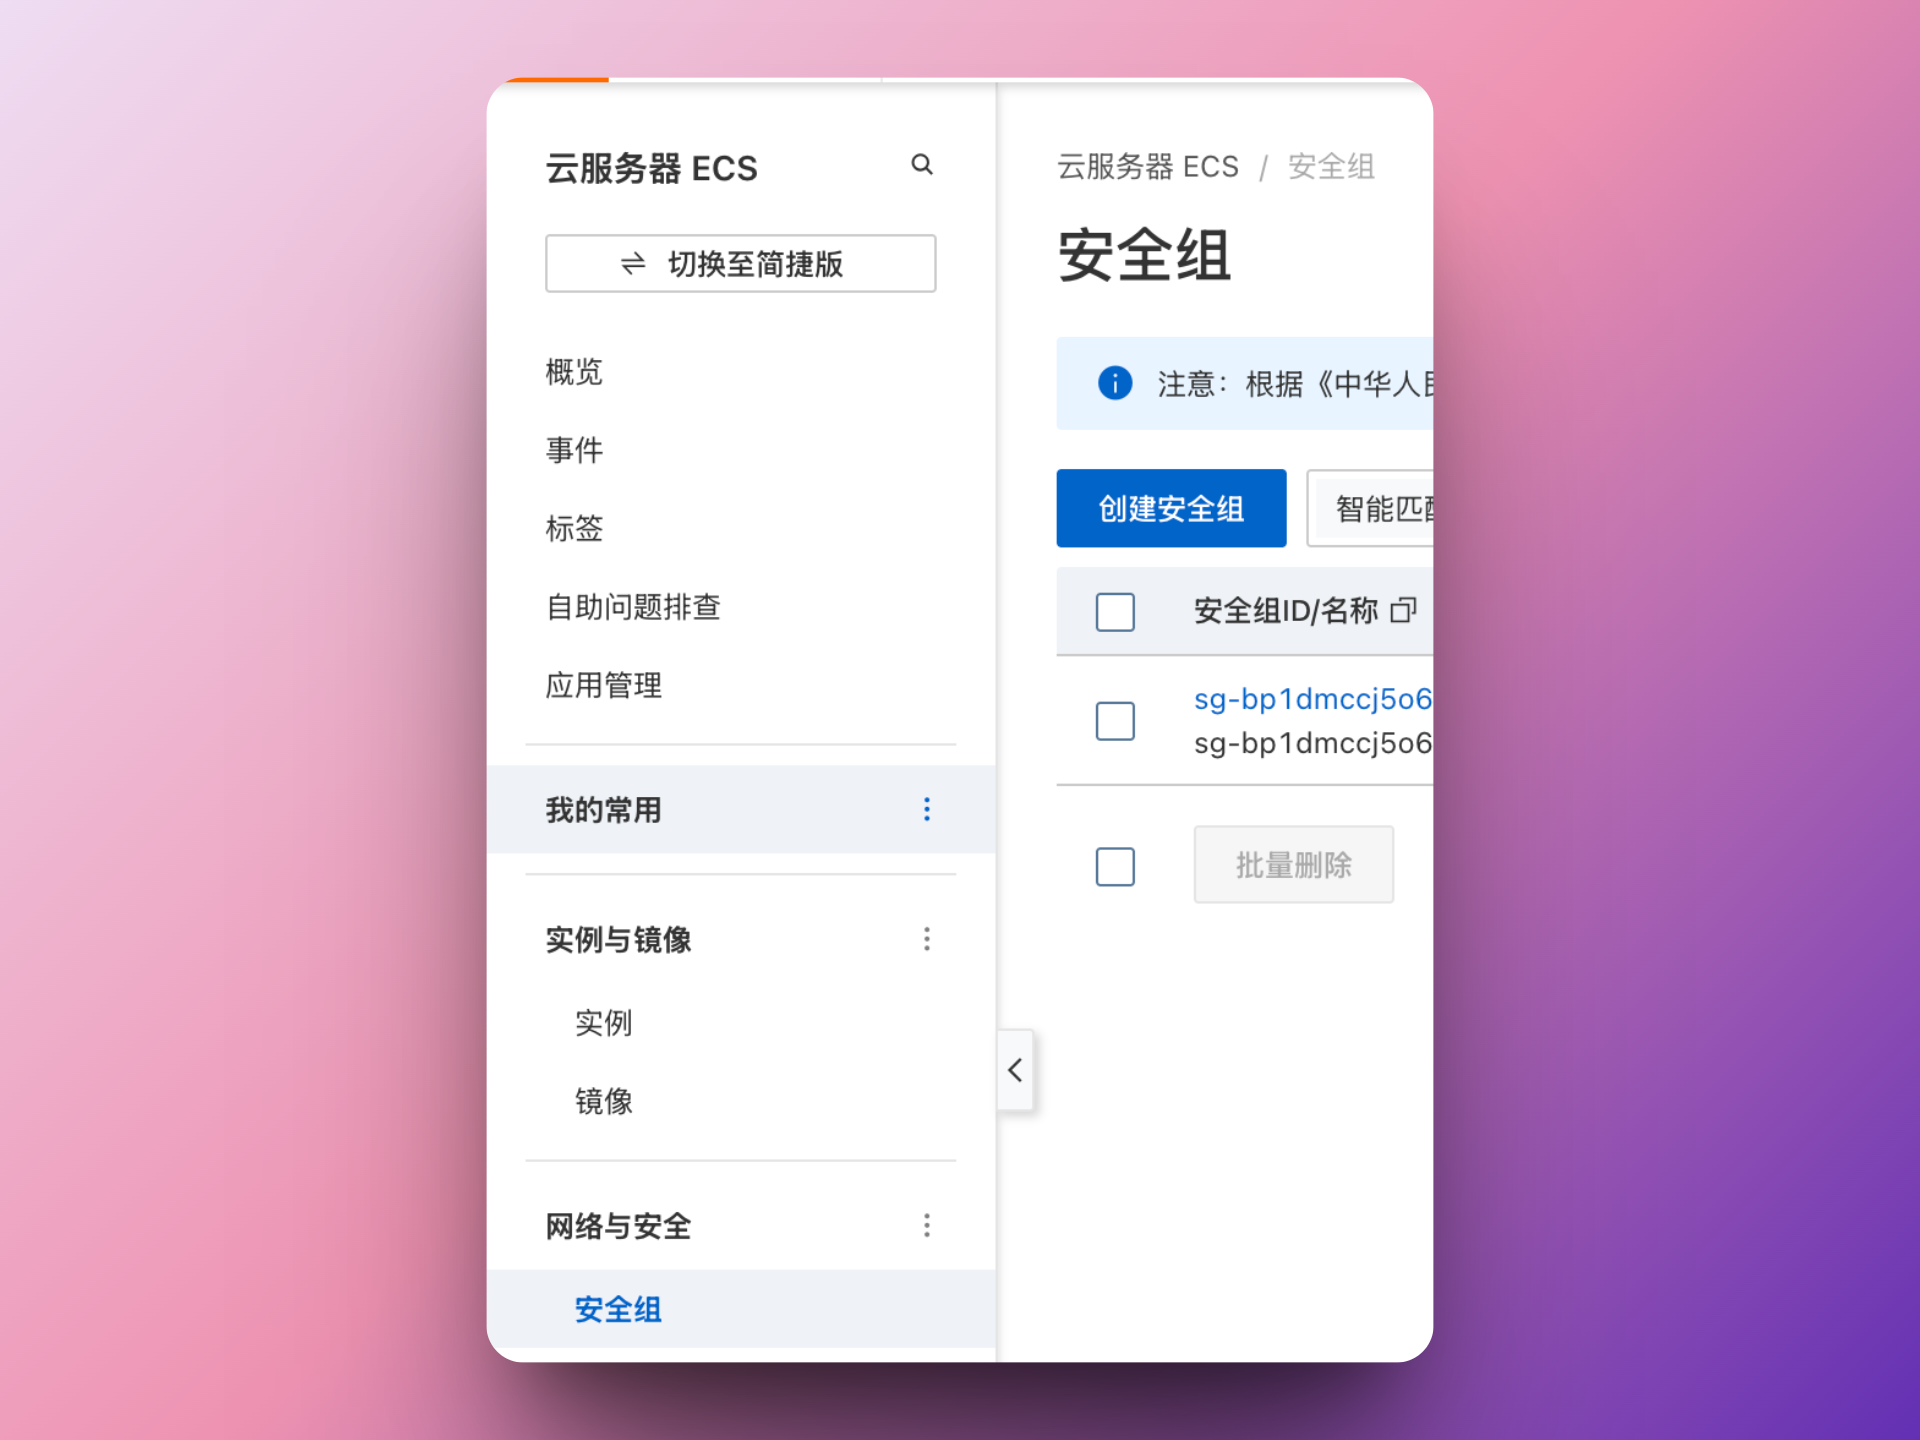
具体配置如下,来源是ipv4的全部地址
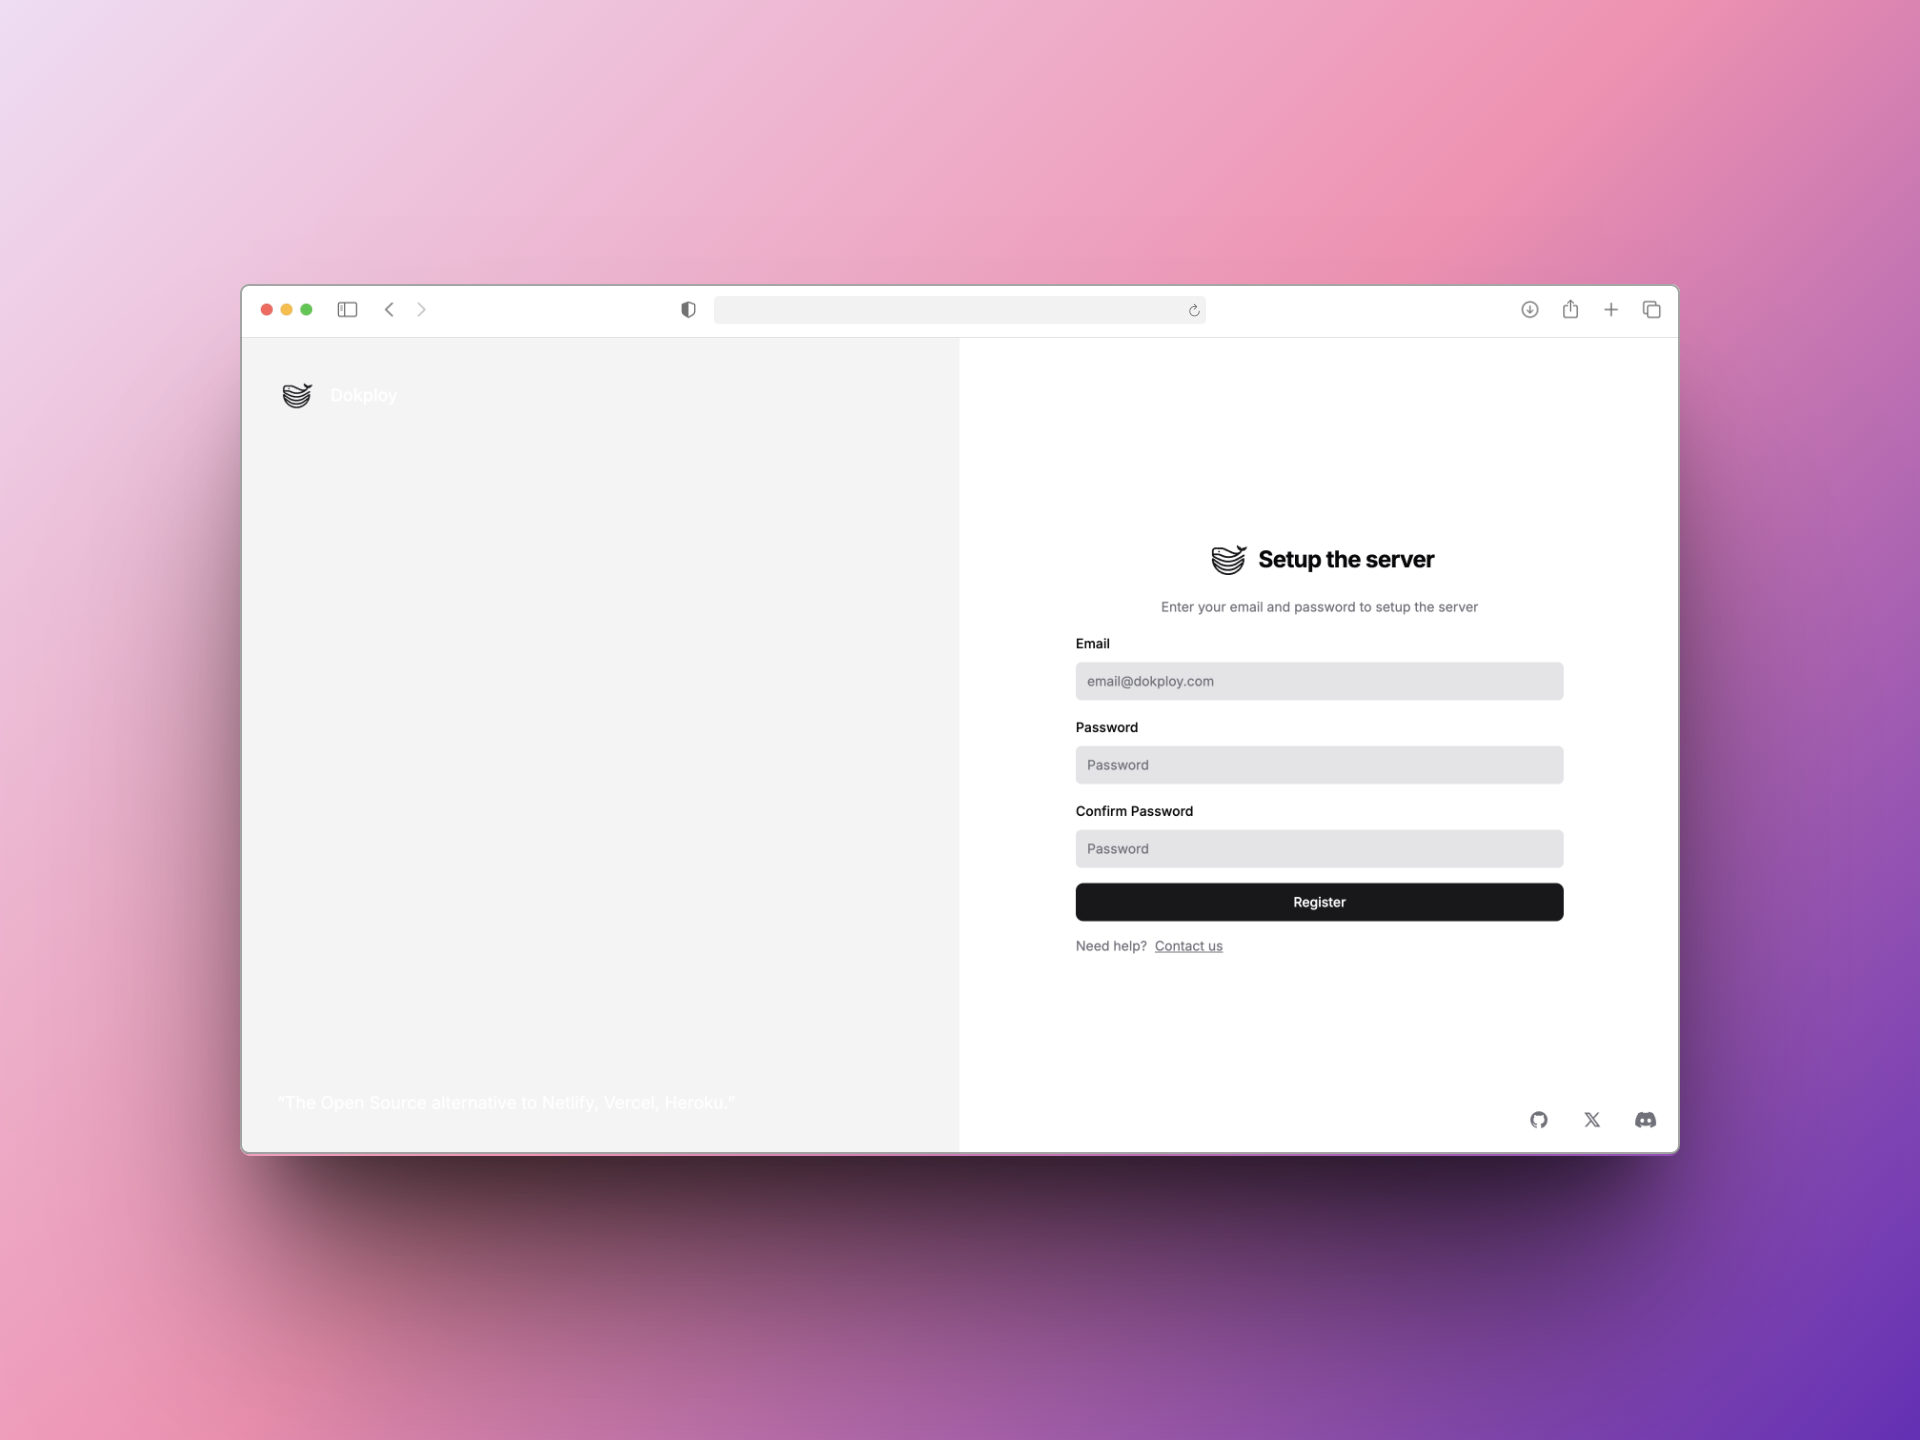
- 进入Dokploy后台管理界面
访问http://{服务器公网ip}:3000,看到以下界面,就说明安装成功了。接下来就是到了注册管理员、配置后台的环节。
安装常见问题
- 如果在运行install.sh的时候输出了以下
Error response from daemon: Get "https://registry01.docker.io/v2/": context deadline exceeded
Error response from daemon: Get "https://registry01.docker.io/v2/": net/http: request canceled while waiting for connection (Client.Timeout exceeded whileawaiting headers)
说明你拉Docker镜像失败了,参考上面的换docker镜像源为国内源
- 如果在安装完成后,打开
http://{服务器公网ip}:3000访问,页面出现502
用命令docker ps看看起了的镜像,是不是有4行,分别为redis:7, traefik:v3.1.2, postgres:16, dokploy/dokploy:latest,如果不是,说明启动失败了,看dokploy/dokploy:latest前面对应的CONTAINER ID,然后输入命令docker logs {CONTAINER ID}看启动日志
配置后台
绑定域名
1.Dokploy后台系统左边边栏选择Server,Server Domain中的Domain中填入你想用来当Dokploy后台页面的域名
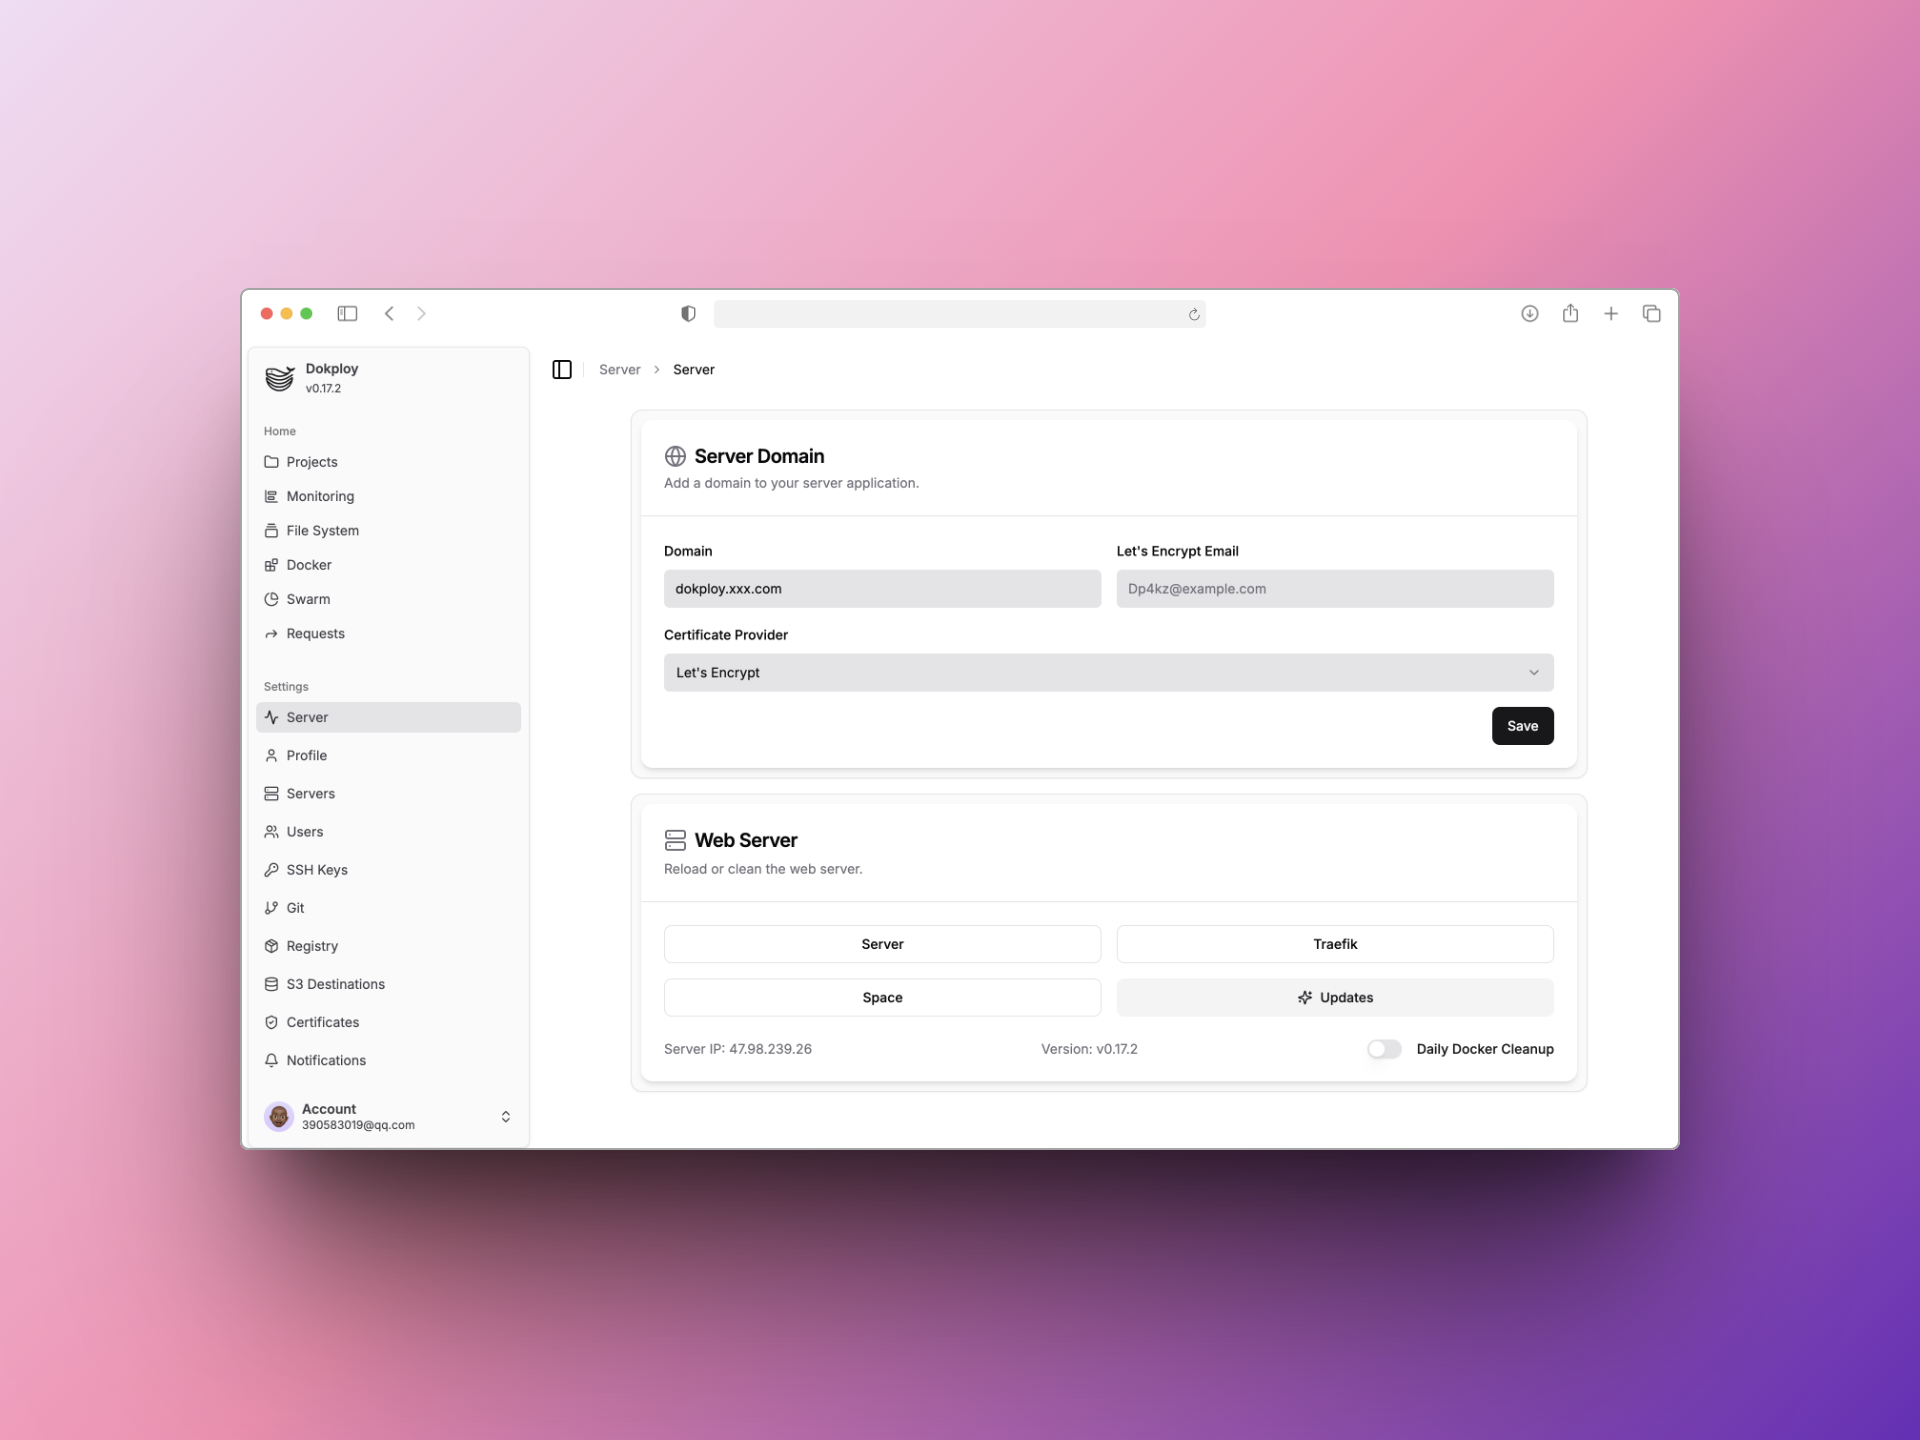
- 新增一条域名dns记录,类型是A记录,记录名是dokploy,值是你的服务器的ip
配置应用
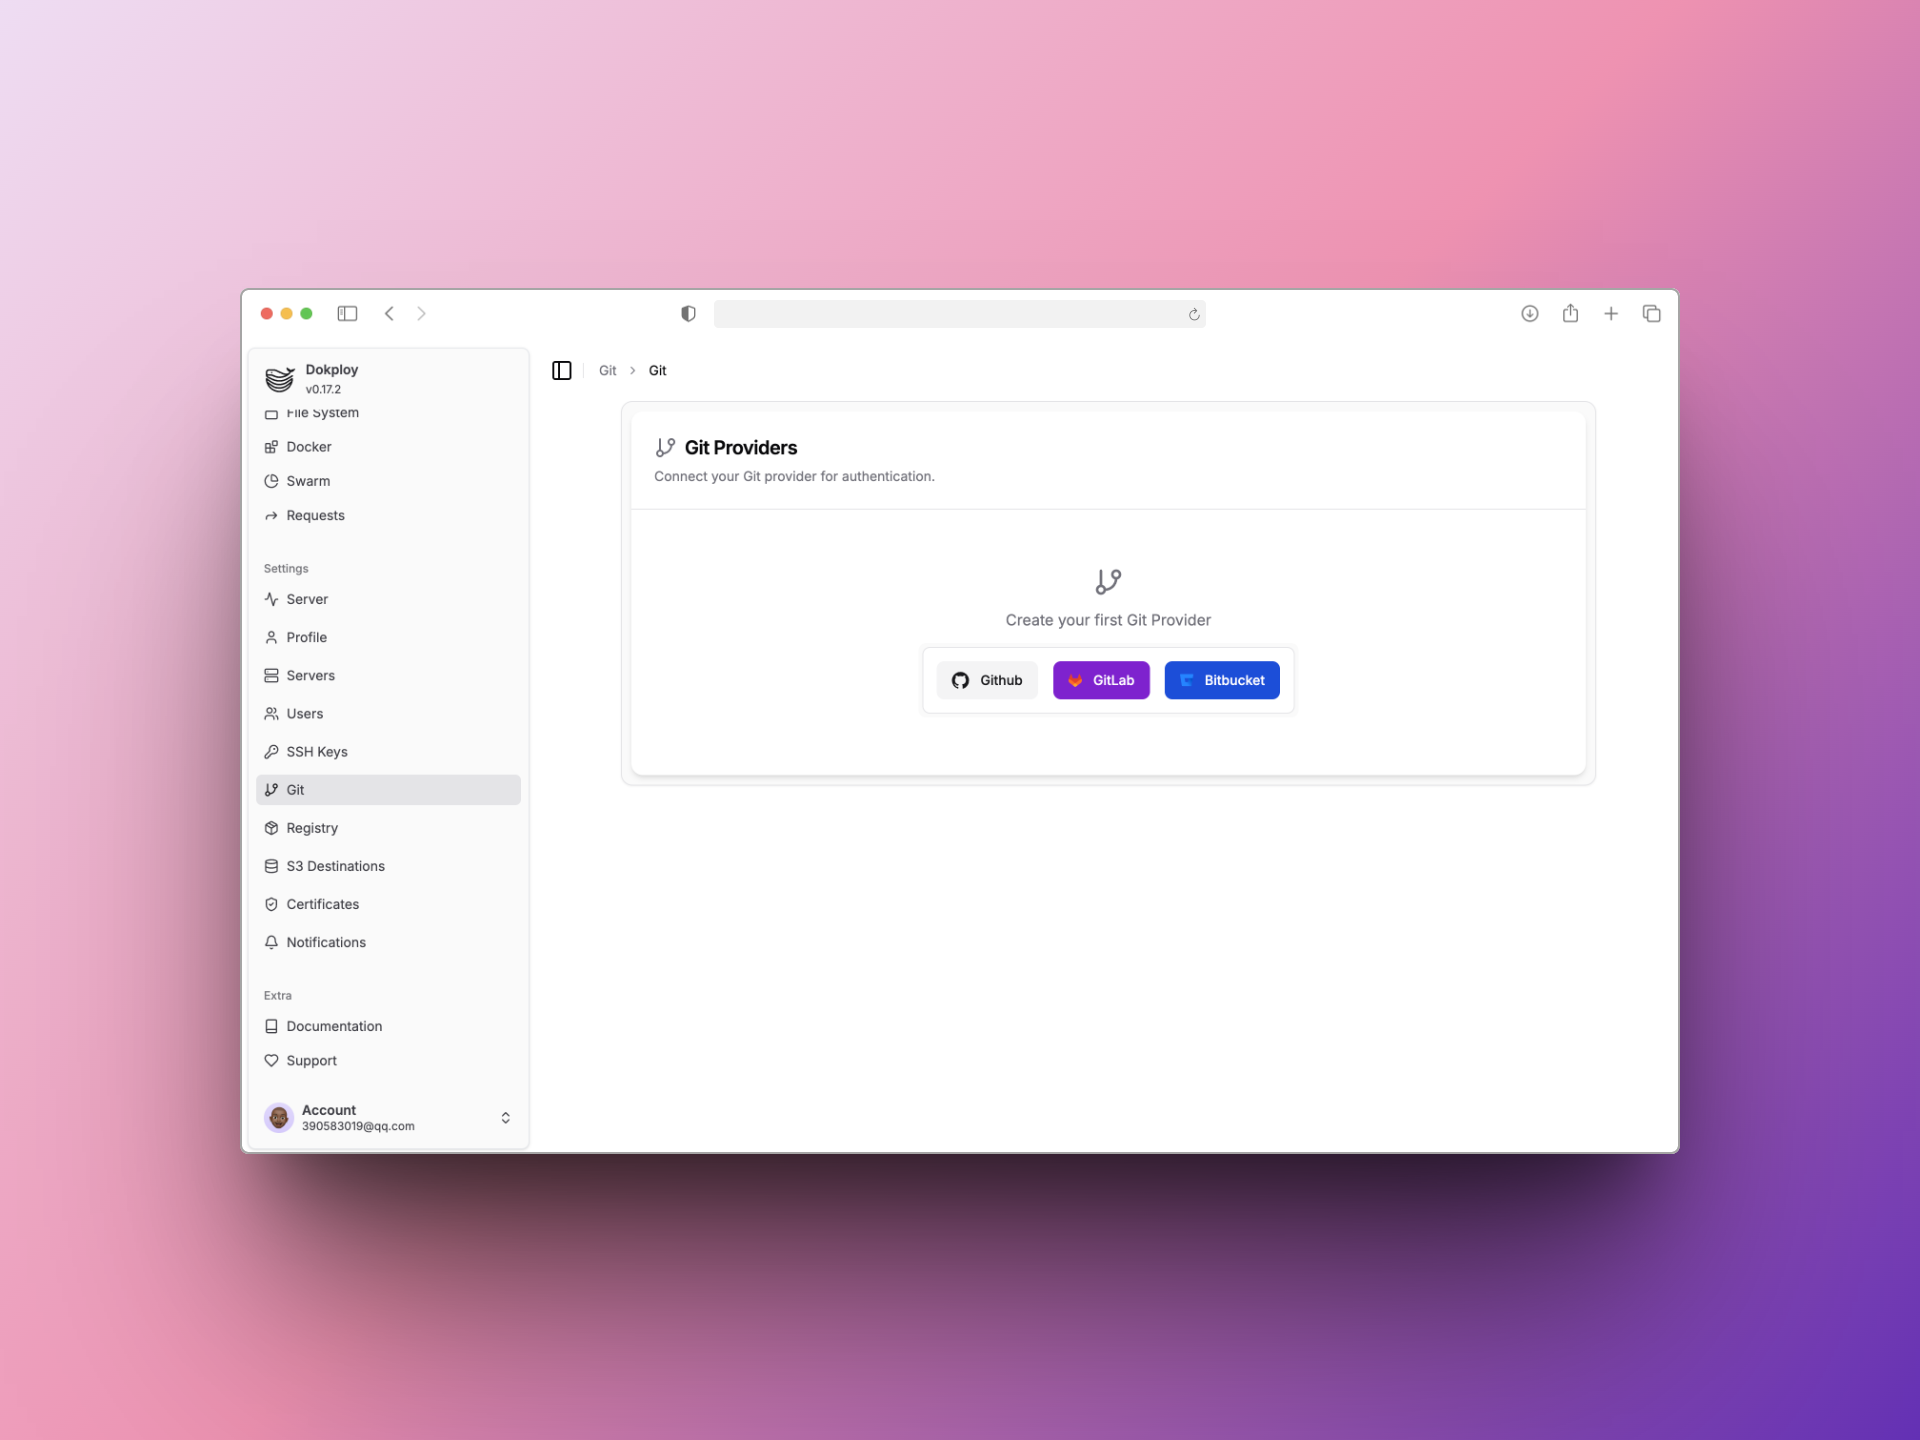
配置GitHub
Dokploy后台系统左边边栏选择Git,Git Provider选择GitHub,创建应用,创建完之后授权仓库
新建应用
左边边栏选择Projects
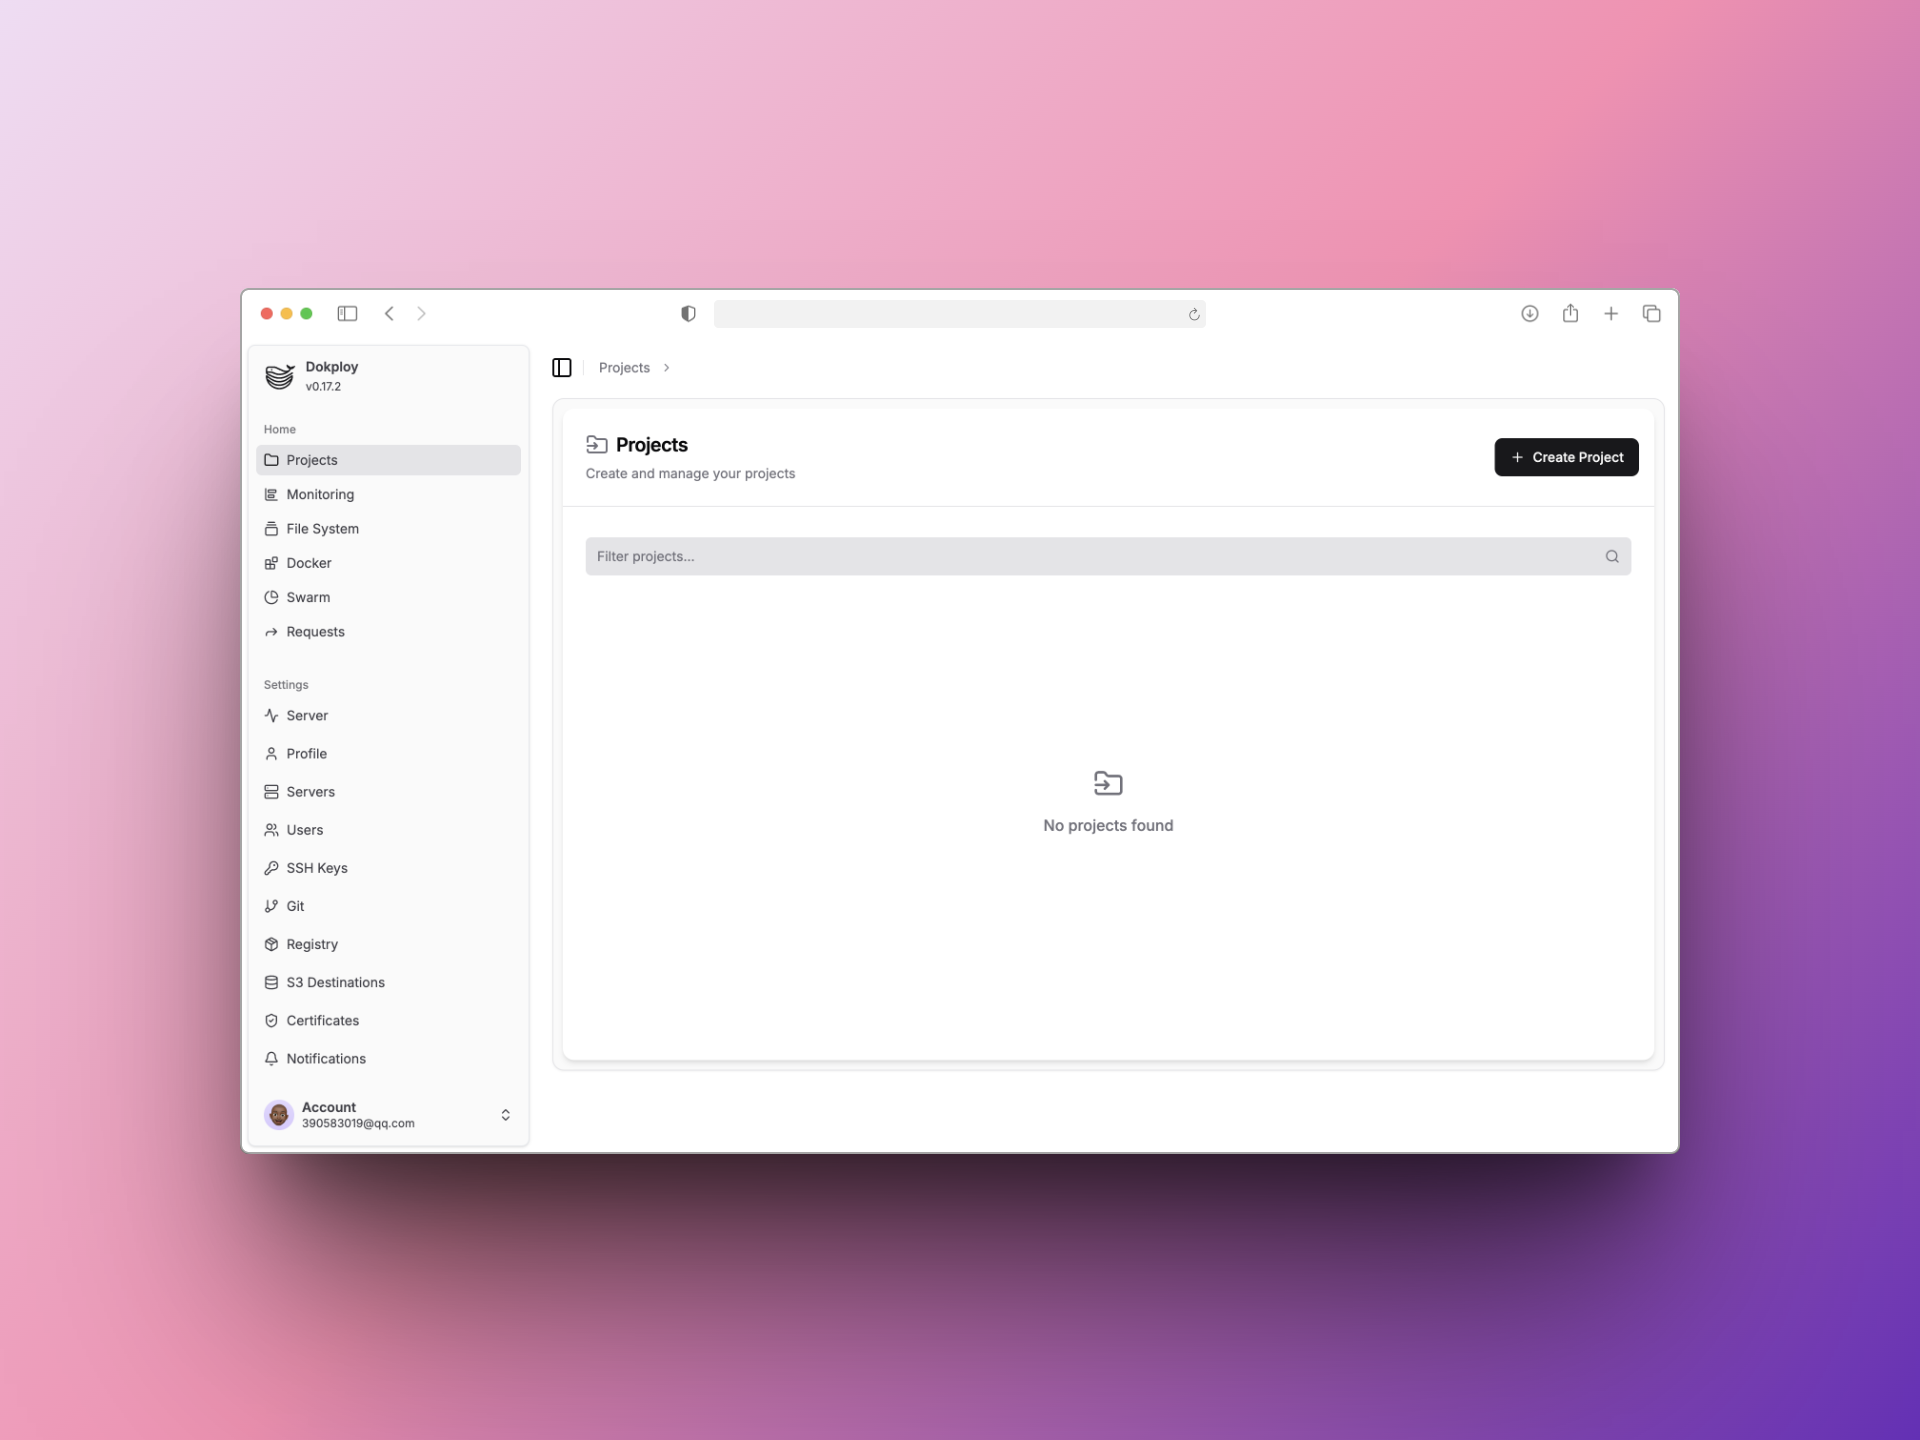
Create Service - Application
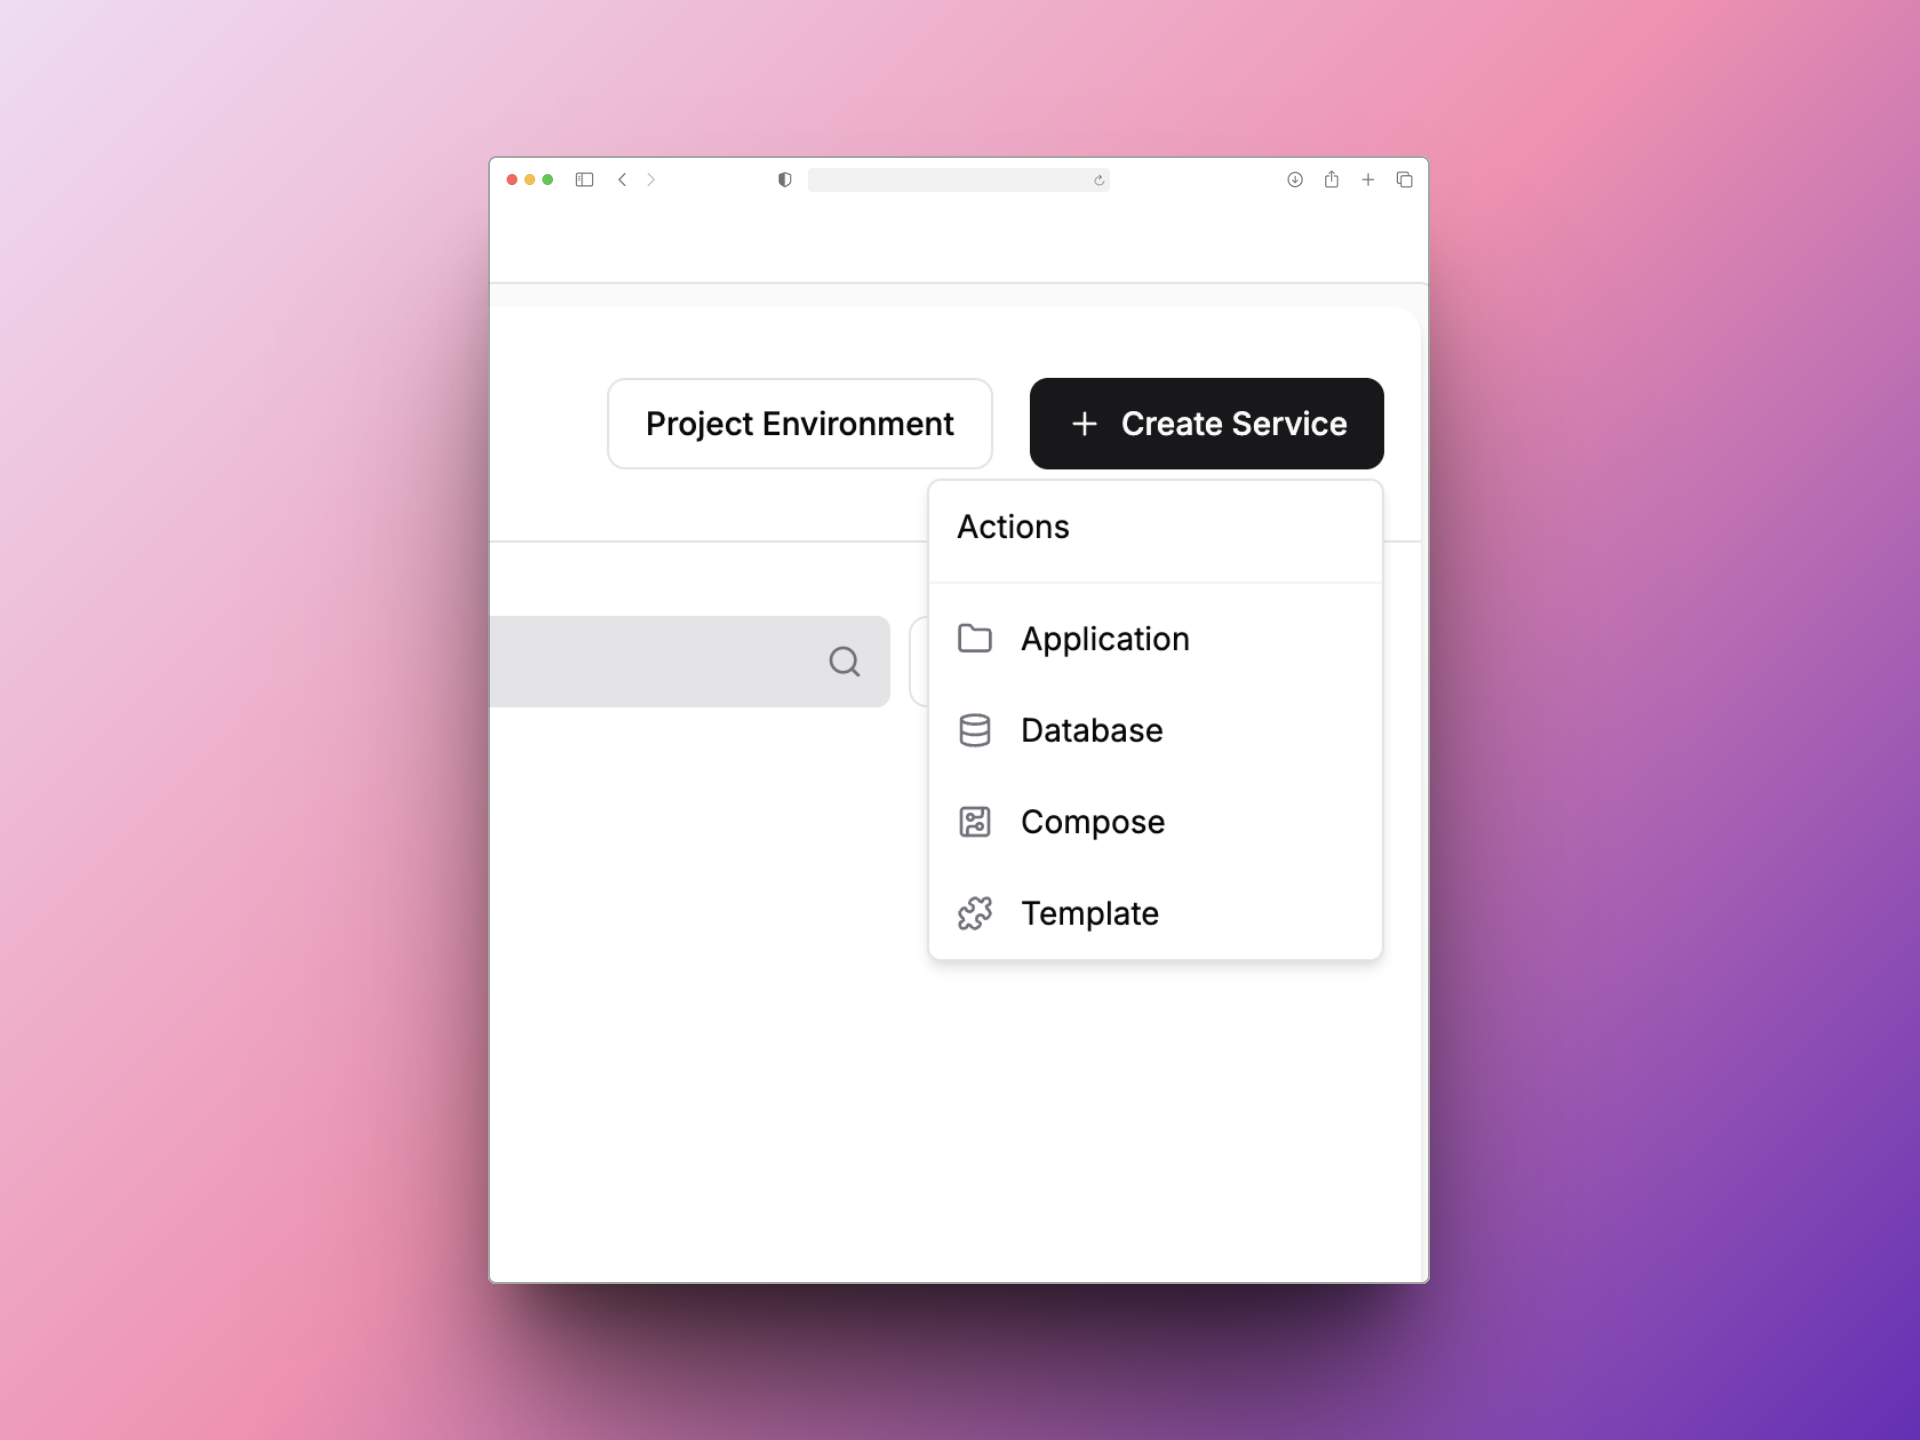
选择对应的GitHub仓库与分支。如果是NextJS应用,Build Type可以跟我一样选择Dockerfile,配置好对应的Dockerfile文件路径,以及在Environment页配置相应的环境变量,然后点击Deploy即可。
直接Deploy
可以点击Deploy,然后等待成功即可。后续每次代码Push到GitHub仓库中,都会自动触发Deploy。
但也有可能存在网络问题,出现不能从GitHub拉取代码,或者npm安装依赖失败等问题,可以考虑使用GitHub Action构建镜像来部署,如下。
利用GitHub Action来Deploy
Github Actions Deploy即利用GitHub Action来构建Docker镜像,镜像托管在Github镜像Registry,服务器上的Dokploy只负责从GitHub拉取最新镜像然后部署上线。具体步骤如下
-
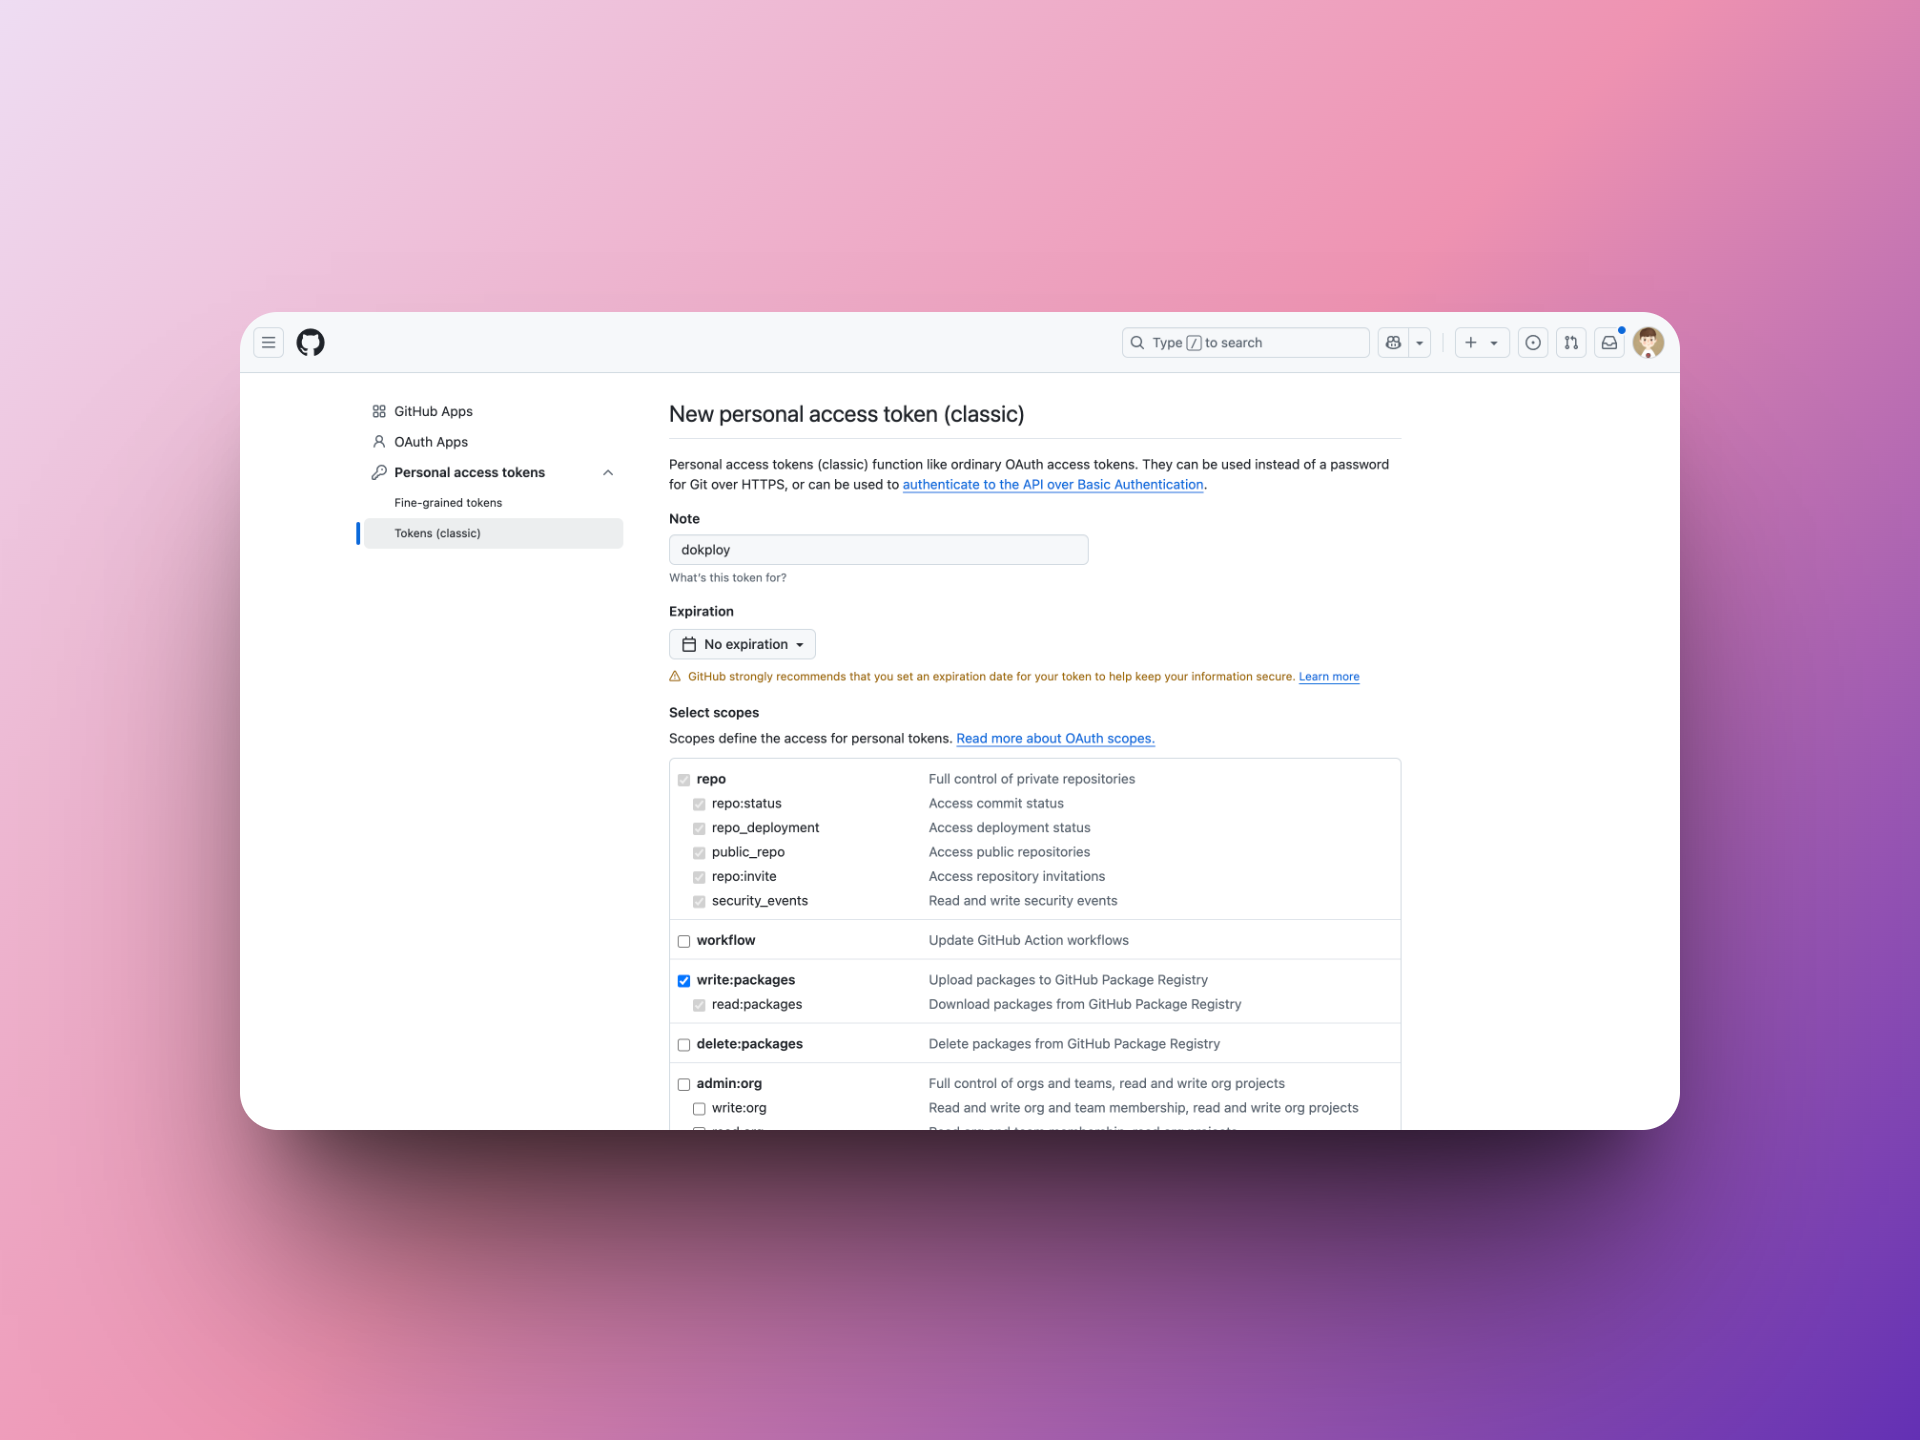
新建GitHub Token 访问获取GitHub Token,如下图配置新建一个GitHub Token
-
Dokploy内配置Registry 左边边栏选择Registry,点击Add Registry,
Username是你的Github账号,Password是前面创建的Token,Registry URL是https://ghcr.io。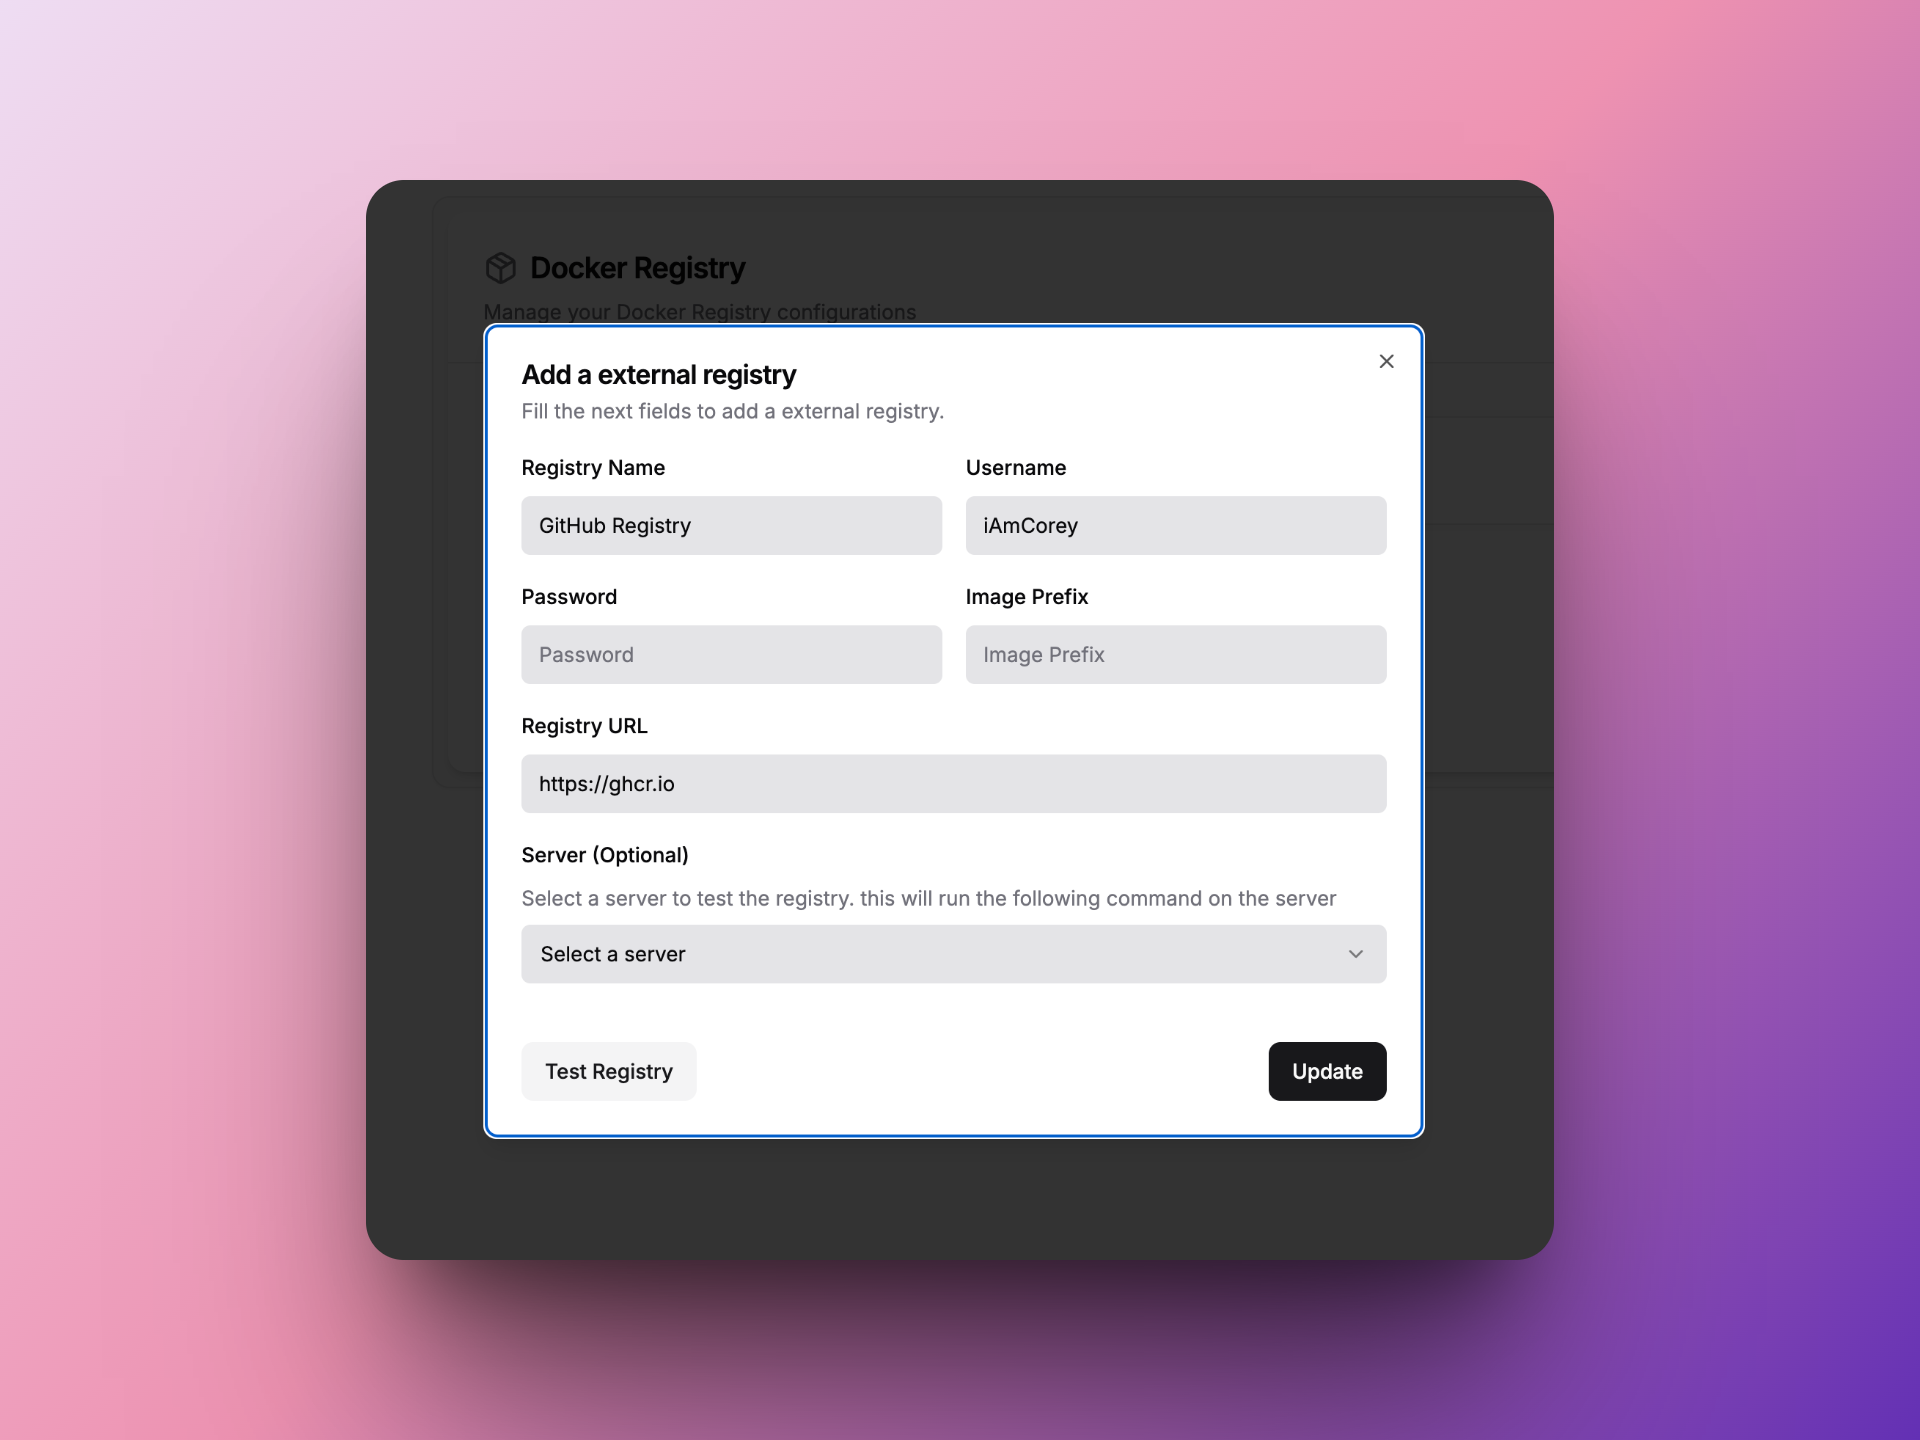
-
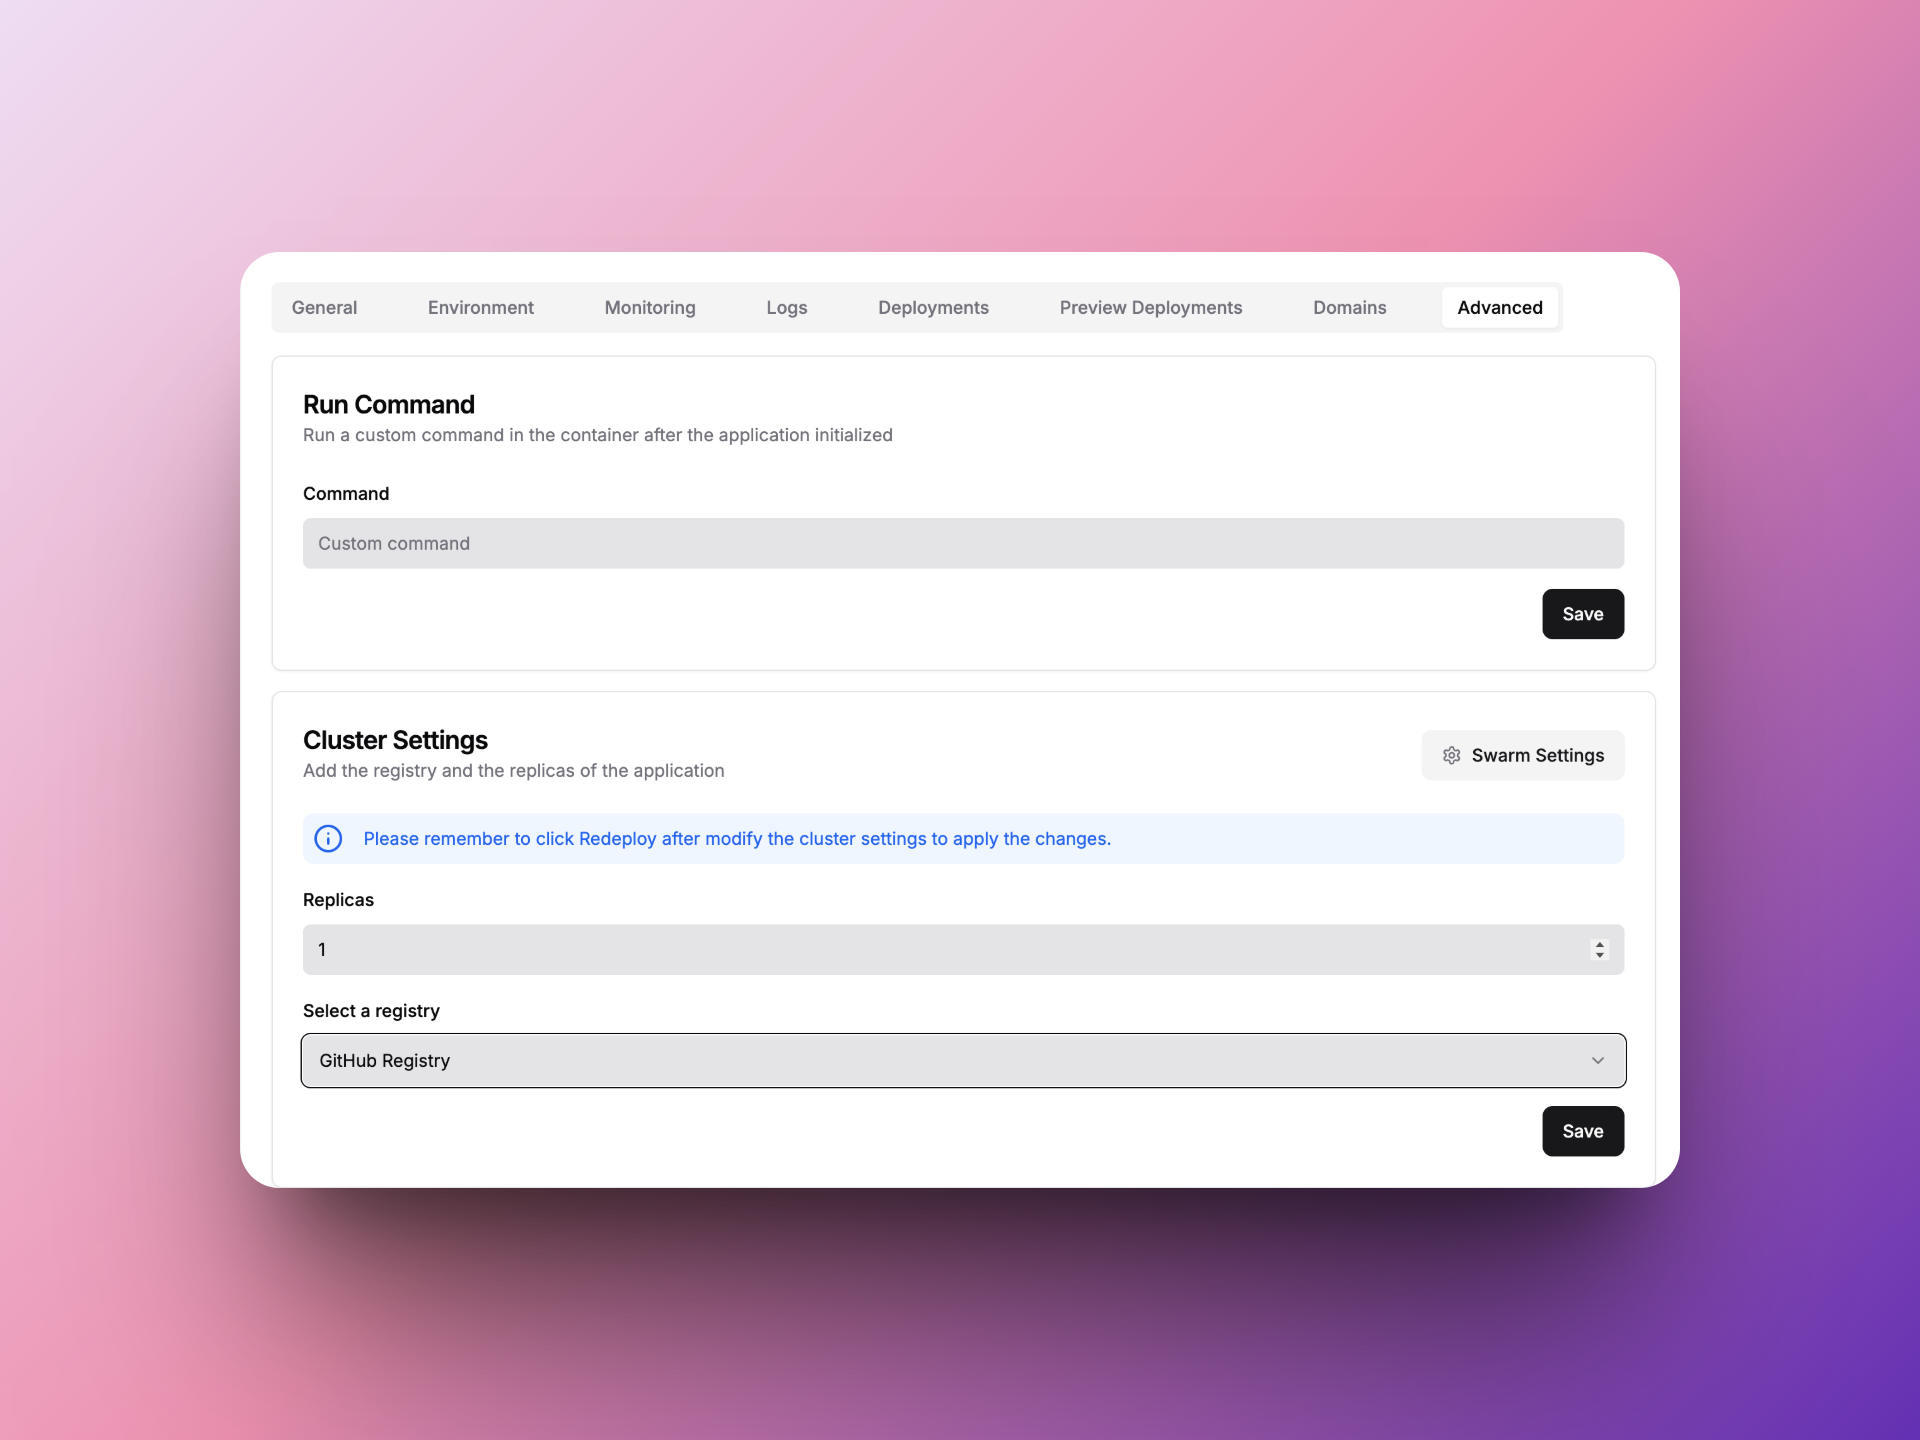
新建应用 Projects中重新新建一个Application或者修改前面建好的Application,Advanced中Cluster Settings中Select a Registry选上刚刚创建的Registry
-
配置Provider 回到General中,Provider选择Docker,
Docker Image中填入ghcr.io/{Github账号}/{Repository项目名}:{分支名},然后保存。这样部署应用的时候,Dokploy就会去GitHub的Registry中拉你这个项目的Docker镜像用于部署。
-
配置项目Workflow 然后还要在此GitHub项目的Action新增一个Workflow(workflow是GitHub中的一个工作流,配置GitHub Action的workflow可以配置GitHub仓库的自动化操作)。
我们要创建一个workflow,用于每次push代码到仓库main分支的时候都自动用你的Dockerfile构建一个Docker镜像到GitHub Registry上,这样Dokploy就会去拉这个最新的镜像用于部署应用。
记得在workflow的yml中最后加上触发Dokploy重新部署的步骤。其中需要填入一个Dokploy的webhook,在deployments中的Webhook URL中获取
我放了一个我在我的项目用到的workflow.yml以及Dockerfile在本文最后以供参考。
- 配置环境变量 注意:使用这个方法的话,项目如果有环境变量,要配置到仓库中去,具体配置方法有两种:
-
简单粗暴法 直接将
.env文件上传到GitHub仓库中去 -
配置法 在workflow的yml文件中build的阶段配置相关变量,Dockerfile也要添加相关的环境变量
然后登录 GitHub 仓库
进入 Settings -> Secrets and variables -> Actions
点击 "New repository secret"
添加以下信息:
Name: {环境变量名}
Value: {环境变量值}
这样设置后,GitHub Actions 在构建 Docker 镜像时就会使用这个环境变量了。
配置应用域名
在Domains页配置想要的域名,然后映射到应用对应的端口,(例如通常NextJS应用是3000, Astro应用是4321),注意把HTTPS打开,也可以点击右边的骰子按钮来生成一个xxx.traefik.me域名,但注意traefik.me域名只能用HTTP访问,不要把HTTPS打开。
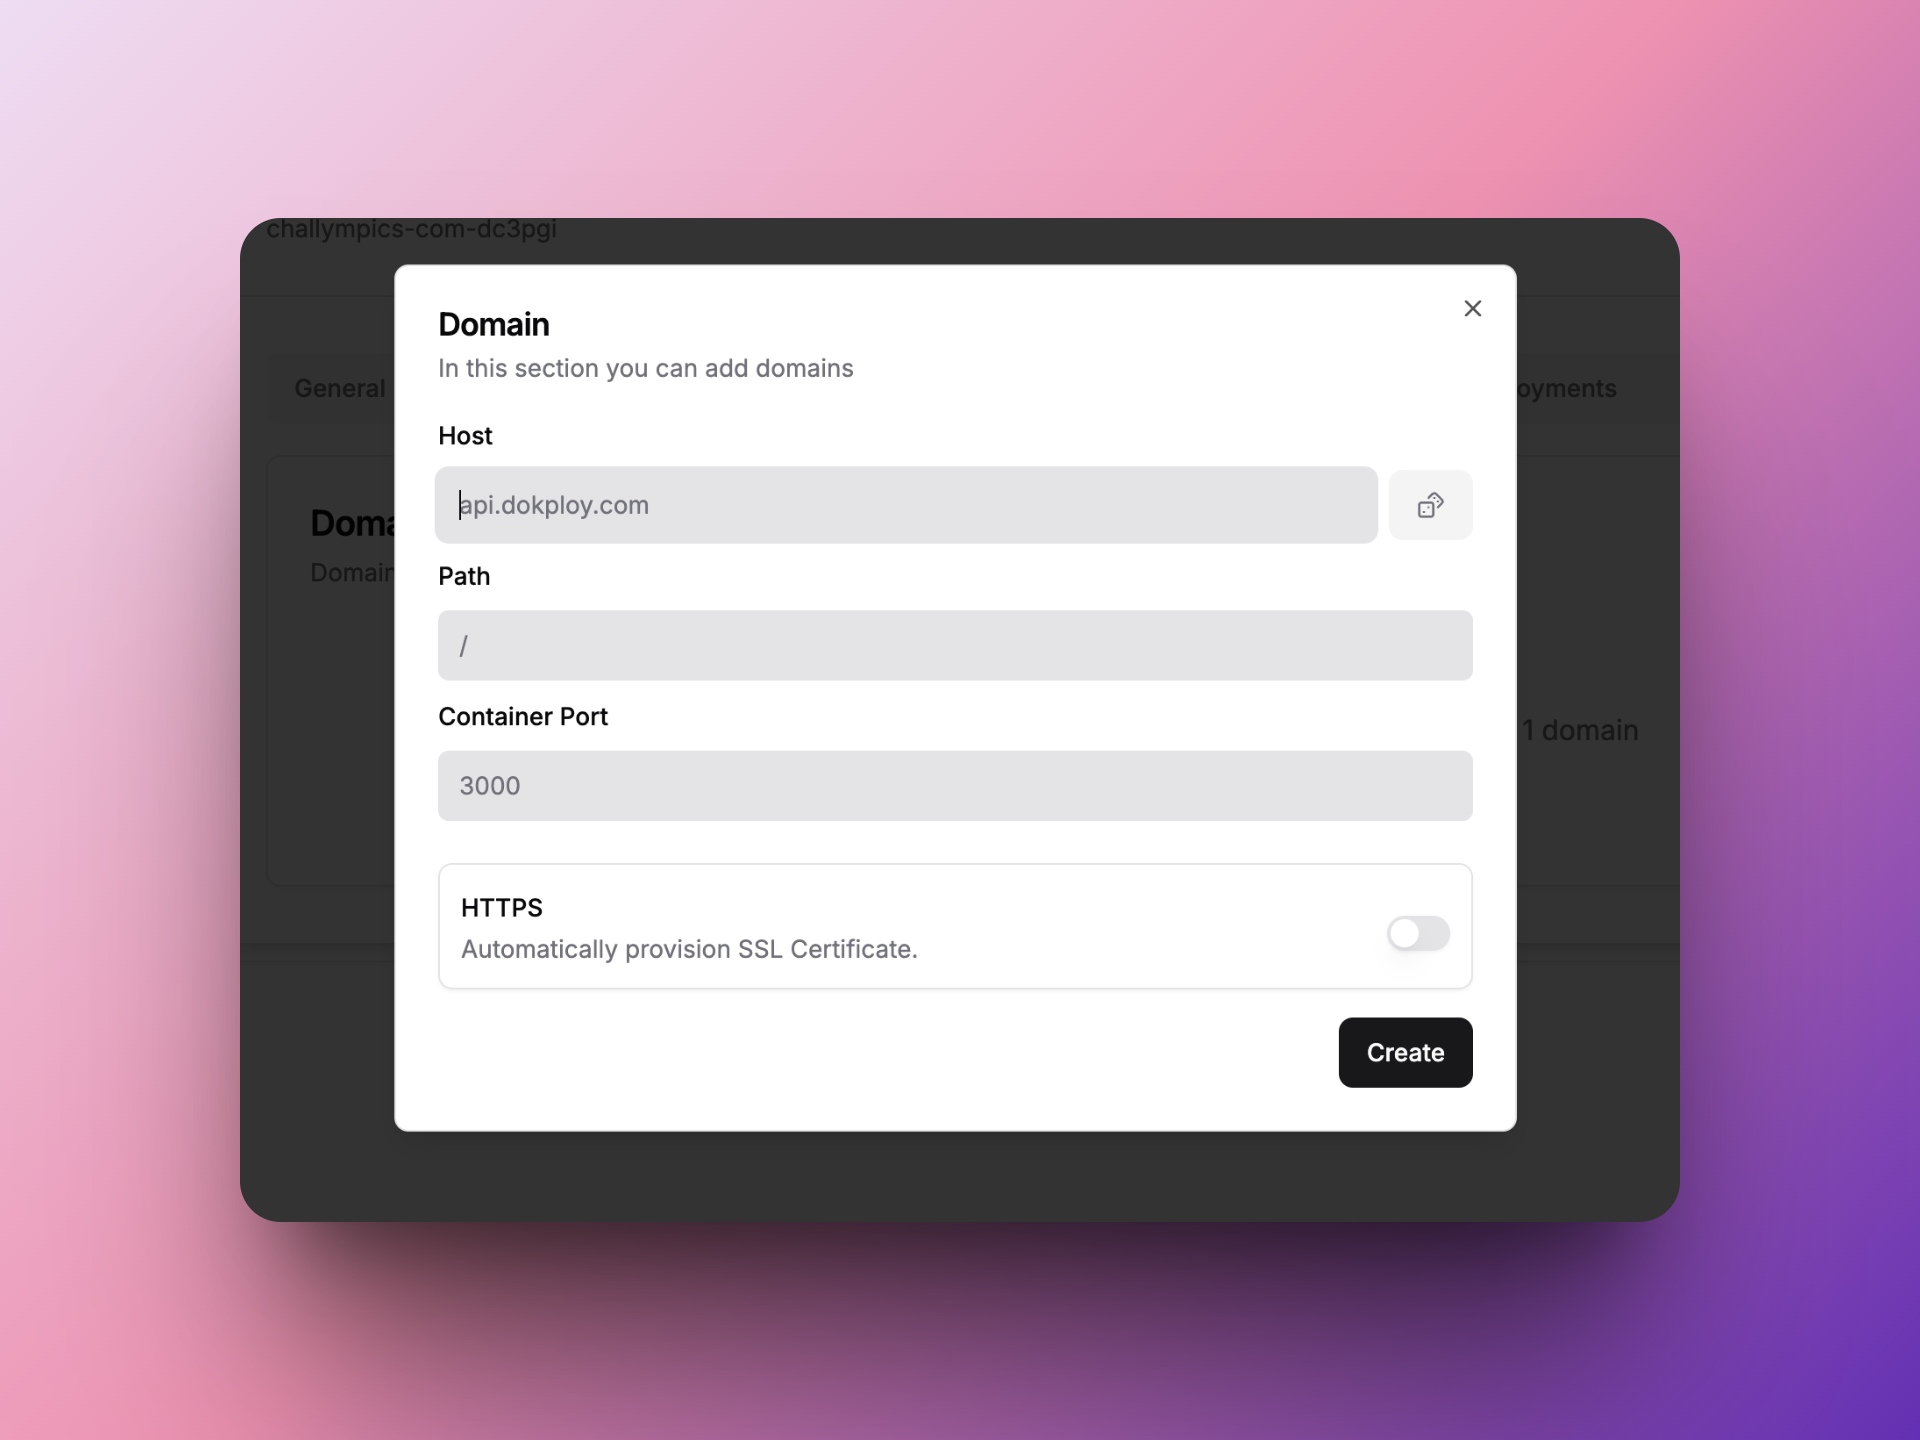
然后即可使用域名访问。
常见问题
- 用
ip:端口访问应用/dokploy后台是正常,但用域名访问失败,页面返回502 currently unable to handle this request.,请检查你的域名DNS解析是否正常,服务器防火墙是否打开80/443端口,Linux服务器内是否开启了防火墙
参考代码
workflow.yml参考
# https://docs.github.com/zh/actions/use-cases-and-examples/publishing-packages/publishing-docker-images
name: Create and publish a Docker image

# Configures this workflow to run every time a change is pushed to the branch called `release`.
on:
  push:
    branches: ['main']

# Defines two custom environment variables for the workflow. These are used for the Container registry domain, and a name for the Docker image that this workflow builds.
env:
  REGISTRY: ghcr.io
  IMAGE_NAME: ${{ github.repository }}

# There is a single job in this workflow. It's configured to run on the latest available version of Ubuntu.
jobs:
  build-and-push-image:
    runs-on: ubuntu-latest
    # Sets the permissions granted to the `GITHUB_TOKEN` for the actions in this job.
    permissions:
      contents: read
      packages: write
      attestations: write
      id-token: write
      #
    steps:
      - name: Checkout repository
        uses: actions/checkout@v4
      # Uses the `docker/login-action` action to log in to the Container registry registry using the account and password that will publish the packages. Once published, the packages are scoped to the account defined here.
      - name: Log in to the Container registry
        uses: docker/login-action@65b78e6e13532edd9afa3aa52ac7964289d1a9c1
        with:
          registry: ${{ env.REGISTRY }}
          username: ${{ github.actor }}
          password: ${{ secrets.GITHUB_TOKEN }}
      # This step uses [docker/metadata-action](https://github.com/docker/metadata-action#about) to extract tags and labels that will be applied to the specified image. The `id` "meta" allows the output of this step to be referenced in a subsequent step. The `images` value provides the base name for the tags and labels.
      - name: Extract metadata (tags, labels) for Docker
        id: meta
        uses: docker/metadata-action@9ec57ed1fcdbf14dcef7dfbe97b2010124a938b7
        with:
          images: ${{ env.REGISTRY }}/${{ env.IMAGE_NAME }}
      # This step uses the `docker/build-push-action` action to build the image, based on your repository's `Dockerfile`. If the build succeeds, it pushes the image to GitHub Packages.
      # It uses the `context` parameter to define the build's context as the set of files located in the specified path. For more information, see "[Usage](https://github.com/docker/build-push-action#usage)" in the README of the `docker/build-push-action` repository.
      # It uses the `tags` and `labels` parameters to tag and label the image with the output from the "meta" step.
      - name: Build and push Docker image
        id: push
        uses: docker/build-push-action@f2a1d5e99d037542a71f64918e516c093c6f3fc4
        with:
          context: .
          push: true
          tags: ${{ steps.meta.outputs.tags }}
          labels: ${{ steps.meta.outputs.labels }}
          # environment variables
          build-args: |
            NEXT_PUBLIC_ARG1=${{ secrets.NEXT_PUBLIC_ARG1 }}
            SEC_ARG2=${{ secrets.SEC_ARG2 }}


      # This step generates an artifact attestation for the image, which is an unforgeable statement about where and how it was built. It increases supply chain security for people who consume the image. For more information, see "[AUTOTITLE](/actions/security-guides/using-artifact-attestations-to-establish-provenance-for-builds)."
      # - name: Generate artifact attestation
      #   uses: actions/attest-build-provenance@v1
      #   with:
      #     subject-name: ${{ env.REGISTRY }}/${{ env.IMAGE_NAME}}
      #     subject-digest: ${{ steps.push.outputs.digest }}
      #     push-to-registry: true

      # Trigger redeploy on dokploy => project webhooks settings
      - name: Trigger dokploy redeploy
        run: |
          curl -X GET {dokploy_webhook}
Dockerfile参考
# https://github.com/nextauthjs/next-auth-example/blob/main/Dockerfile
# syntax=docker/dockerfile:1
FROM node:20-alpine AS base

# Install dependencies only when needed
FROM base AS deps
# Check https://github.com/nodejs/docker-node/tree/b4117f9333da4138b03a546ec926ef50a31506c3#nodealpine to understand why libc6-compat might be needed.
RUN apk add --no-cache libc6-compat
WORKDIR /app

# Install dependencies
COPY package.json pnpm-lock.yaml* ./
RUN npm install -g pnpm && pnpm i --frozen-lockfile

# Rebuild the source code only when needed
FROM base AS builder
WORKDIR /app
COPY --from=deps /app/node_modules ./node_modules
COPY . .

# 声明构建参数
ARG ARG1

# 设置环境变量
ENV ARG1=$ARG1

# Next.js collects completely anonymous telemetry data about general usage.
# Learn more here: https://nextjs.org/telemetry
# Uncomment the following line in case you want to disable telemetry during the build.
# ENV NEXT_TELEMETRY_DISABLED 1

RUN npm install -g pnpm \
  && mv next.config.docker.mjs next.config.mjs \
  && pnpm build

# Production image, copy all the files and run next
FROM base AS runner
WORKDIR /app

ENV NODE_ENV production
# Uncomment the following line in case you want to disable telemetry during runtime.
# ENV NEXT_TELEMETRY_DISABLED 1

RUN addgroup --system --gid 1001 nodejs
RUN adduser --system --uid 1001 nextjs

COPY --from=builder /app/public ./public

# Set the correct permission for prerender cache
RUN mkdir .next
RUN chown nextjs:nodejs .next

# Automatically leverage output traces to reduce image size
# https://nextjs.org/docs/advanced-features/output-file-tracing
COPY --from=builder --chown=nextjs:nodejs /app/.next/standalone ./
COPY --from=builder --chown=nextjs:nodejs /app/.next/static ./.next/static

USER nextjs

EXPOSE 3000

ENV PORT 3000
ENV HOSTNAME "0.0.0.0"

# server.js is created by next build from the standalone output
# https://nextjs.org/docs/pages/api-reference/next-config-js/output
CMD ["node", "server.js"]